
Verwandte Anleitungen für Zanussi NH 90 EPN


Inhaltszusammenfassung für Zanussi NH 90 EPN
- Seite 1 INSTALLATION, USE AND MAINTENANCE HANDBOOK HANDBUCH FÜR INSTALLATION. BEDIENUNG UND WARTUr^ MANUEL D'INSTRUCTIONS FOUR L'INSTALLATION, L'EMPLOI ET L'ENTRETIEN INSTRUCnES VOOR MONTAGE, GEBRUIK EN ONDERjlOUD MANUALE DI l^fôTALLASC^E, USO E MANUTENZIONE...
-
Seite 2: Inhaltsverzeichnis
INHALT CONTENTS DESCRIBING THE BESCHREIBUNG DER COOKER HOOD DUNSTABZUGSHAUBE - Rating plate - Typenschild - Dimensions - Abmessungen WARNINGS HINWEISE SETTING UP MONTAGE INSTALLATION INSTALLATION ELECTRICAL ELEKTRISCHER CONNECTION ANSCHLUß GEBRAUCH - Controls - Schalter MAINTENANCE WARTUNG... -
Seite 3: Describing The Cooker Hood
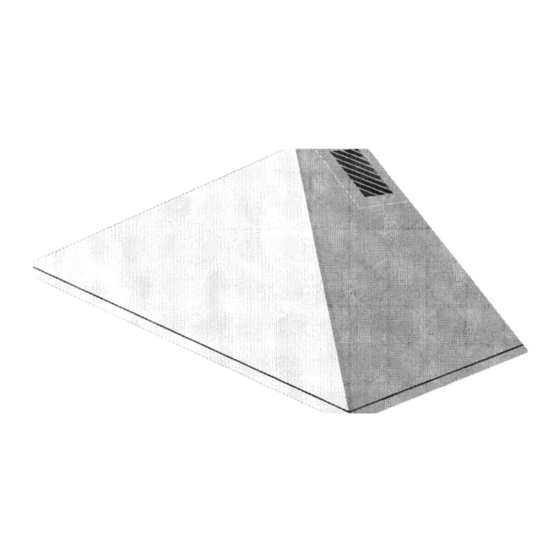
DESCRIBING THE BESCHREIBUNG □ COOKER HOOD DUNSTABZUGSHAUBE Diese Dunstabzugshaube ist für This domestic cooker hood has den Haushalt und speziell für been designed for the purifica die Ansaugung von Kochdunst tion of contaminated air and to entworfen. Die Haube ist zur remove odours in the kitchen Wandmontage über einem when fixed to the wall, over a... - Seite 4 DESCRIBING THE BESCHREIBUNG □ □ COOKER HOOD DUNSTABZUGSHAUBE The cooker hood is available in Die Haube ist in folgenden Aus the following executions: führungen verfügbar: • Standard • Standard With a complete front panel Das Frontpaneel ist einteilig. • Personalized •...
-
Seite 6: Beschreibung
|T^ DESCRIBING THE BESCHREIBUNG r ^ COOKER HOOD J DER DUNSTABZUGSHAUBE Control panel Schaltpult To gain access to the concealed Um das Schaltpult zu öffnen control panel apply slight pres und wieder einzuschwenken, sure to the front edge of the reicht es, leicht in der Mitte zu 92^0 i cover and the panel will spring... - Seite 7 BESCHREIBUNG DESCRIBING THE □ COOKER HOOD DUNSTABZUGSHAUBE Abmessungen: Dimensions: Diese Hauben sind in folgen These cooker hoods are avail den Breiten verfügbar: able in the following dimensions: • 60cm • 60cm • 90cm • 90cm • 120cm • 120cm 4 f ' ABMESSUNG DIMENSIONS lililí...
- Seite 8 WARNINGS HiNWEISE This cooker hood has been de Diese Dunstabzugshaube ist signed for the purification of zum Reinigen von verunreinig contaminated air and to remove ter Luft bzw. zum Herausfiltern odours in the kitchen. von unangenehmen Gerü chen und Schwebestoffen aus Schwaden, die beim Kochen Überder Kochstelle entstehen, bestimmt...
- Seite 9 i WARNINGS ATTENTION! Before carrying out any kind of maintenance or cleaning of the cooker hood: Disconnect the hood from the mains supply (switch in position 0) Unplug from the socket. Connect the hood to the mains supply via a double pole switch which has 3mm minimum clea...
- Seite 10 HINWEISE Es ist sicherzustellen, daß die Netzspannung den Anschluß werten auf dem Typenschild im Inneren der Dunstesse ent spricht. Der Gerätestecker muß geer det sein. ACHTUNG! Keine ungeerdeten Stecker oder Steckdosen verwenden. ACHTUNG! Für den Anschluß an das Netz sollen keine Adapter oder Veriängerungen eingesetzt werden.
- Seite 11 WARNINGS HINWEISE When used in the extraction Die Dunsthaube nicht an mode the cooker hood ducting Rauch- oder Abgaskamine must not be connected to a flue anschließen, die noch für which is used for exhausting offene Feuerstellen benutzt fumes from appliances supplied werden (Warmwasser...
- Seite 12 HINWEISE WARNINGS Frittiergeräte, die unter der Never leave frying pans unat Dunstesse betrieben werden, tended during use as overhea sind während der gesamten ted fat and oil may catch fire. Betriebsdauer zu beaufsichti gen: überhitztes Öl kann die Haube in Brand setzen. Wenn in dem Raum außer der If the room where the cooker Haube andere, nicht elektrisch...
- Seite 13 HINWEISE Die Flamme ist zu regulieren, Always ensure that the flame is um zu vermeiden, daß sie kept at the correct intensity to sich seitlich über den Topf prevent the flame from licking boden hinaus ausbreitet. round from the bottom of the Man spart auf diese Weise Ener...
- Seite 14 HINWEISE WARNINGS ACHTUNG! ATTENTION! Vor Benutzung der Dunst Please read this instruction haube ist der Inhait der Bedie booklet carefully before in nungsanleitung in ailen Teiien stalling or using this appiian- zur Kenntnis zu nehmen und zu beachten. ATTENTION! ACHTUNG! Keine Gegenstände in die Do not insert hands or any Luftaustrittsöffnung stecken.
- Seite 15 WARNINGS Should your cooker hood fail to function at anytime repairs should be carried out by a qua lified electrician or a competent person. In case of abnormal function ing: • Disconnect the hood from the mains supply. • Ask for service by an autho rized Service Centre.
- Seite 16 MONTAGE ^ SETTING UP Personaiisierung Personalization The front panel of the cooker Das Frontpaneel der Haube kann auch nach der hood may be personalized either Instal-Iation personalisiert priorto, or after installation. Pro wer-den, verfahren sie wie ceed as follows: folgt: unter Verwendung eines Kreuz...
- Seite 17 ^ SETTING UP MONTAGE Once the external trim has been Nachdem der Wechselrahmen removed (not before), prepare abgenommen worden ist (nicht the personalized panel ensur vorher), kann das personalisier ing the dimension of the trim is te Frontpaneel angepaßt wer the same size as indicated by den, wobei die Abmessungen the arrows: the personalized...
- Seite 18 SETTING UP • Putthe panel upside down and apply the gasket as shown. (The gasket is not required for personalized panels with a thickness of more than 5mm). • Refit the fixing bracket and fasten the three screws as shown in the picture. •...
- Seite 19 INSTALLATION INSTALLATION Before commencing the installa> Wegen des notwendigen Mon tion, consideration should be tage-aufwandes given to the difficulties to be found betracht- liehen Eigengewichtes during installation and to the bulky dieses Gerätes empfiehlt es sich, weight of the hood. The installa> die Anbringung von geschultem tion work must be undertaken by Personal durchführen zu lassen,...
- Seite 20 INSTALLATION INSTALLATION Fixing the wall bracket Anbringung des Wandbieches (cooker hood without chimney (Haube ohne Kamin und mit and with splashback) Rückwand) DIMENSIONS ABMESSUNG • Draw a vertical line on the wall • Festlegung der Gerätemitte from the centre of the cooking und Anzeichnung einer lotrech...
- Seite 21 INSTALLATION INSTALLATION Fixing the wall brackets (cooker Installation der Wandbleche hood with chimney and with (Haube mit Kamin und splashback) Rückwand) DIMENSIONS ABMESSUNG • Draw a vertical line on the wall • Festlegung der Gerätemitte und at the centre of the area which Anzeichnung einer lotrechten was foreseen for the installation of Hilfslinie zur Decke an der Stelle,...
- Seite 22 INSTALLATION INSTALLATION Fitting the canopy Installation der Haube At least 2 people are required to Von wenigstens zwei Personen carry out the installation work: durchzuführen: • Remove the recirculation grille • Obere Abdeckung (falls mon (if fitted) to gain access the air tiert) abnehmen, um den Luftab...
- Seite 23 INSTALLATION INSTALLATION Fitting the duct Installation der Adapter (recirculation mode) (Umluftversion) (When the hood is installed in (Die gefilterte Luft wird durch the recirculation mode, the air is die beiden seitlichen Luftleitgit recirculated into the kitchen ter, die auf Anfrage auf unter through the two venting grilles schiedlichen Höhen angeord...
- Seite 24 INSTALLATION INSTALLATION Fitting the telescopic chimney Installation des teleskopier- stack baren Kamines (When the telescopic chimney (Diese Installation ist gültig für is fitted the hood can be used Umluft und Abluftversion). either in the evacuation or in the • Oberes Teleskopteil S leicht recirculation mode).
-
Seite 25: Electrical Connection
ELECTRICAL ELEKTRISCHER CONNECTION ANSCHLUSS ATTENTION! ACHTUNG! \ \ 1 / / Before connecting this appli Vor dem elektrischen Ansch VOLT ance to the mains supply: luß: 9211 • Ensure that the mains volta • Es ist sicherzustellen, daß '.......Hz TOT......W ge corresponds to the voltage die Netzspannung den An... -
Seite 26: Gebrauch
GEBRAUCH Controls Schalter The cooker hood controls are Die Schalter befinden sich located in a concealed control normalerweise Im Inneren panel, on the underside of the des Gehäuses verborgen. canopy. Um sie zur Bedienung zugän To gain access to the control glich zu machen (und wieder panel apply slight pressure to einzuschwenken), drückt man... -
Seite 27: Wartung
MAINTENANCE WARTUNG Regular maintenance and clea Eine ständige Wartung garan ning will ensure good perfor tiert eine gute Arbeitsweise so mance and reliability, while ex wie eine gute Leistung über tending the working life of the lange Zeit. Besondere Pflege hood. - Seite 28 MAINTENANCE WARTUNG Replacing the lamp Lampenaustausch A 15W fluorescent strip lamp Die Beleuchtung besteht ensures the illumination of the aus einer Leuchtstoffröhre worktop. von 15 Watt. ATTENTION! ACHTUNG! Before replacing the iamp Vordem Lampenaustausch disconnect the hood from ist der Hauptschalter the mains and unplug the ap...
- Seite 29 MAINTENANCE WARTUNG Cleaning Reinigung For the normal external clean Für die übliche Außenreinigung ing of the hood: der Haube: • Do not use wet clothes or • Keine nassen Tücher oder sponges. Schwämme verwenden. • Do not use abrasive cleaning •...
- Seite 30 DESCRIBING THE BESCHREIBUNG r J COOKER HOOD J DER ^ ^ DUNSTABZUGSHAUBE ..The cooker hood is available in Die Haube ist in folgenden Aus the following executions: führungen verfügbar: • Standard • Standard With a complete front panel A, Das Frontpaneel A ist einteilig.
- Seite 31 C € Dir. 89/336/CEE 73/23/CEE 4324086 02 - 0399...