
Verwandte Anleitungen für Electrolux EUN 12500


Inhaltszusammenfassung für Electrolux EUN 12500
- Seite 1 G e f r i e r s c h r a n k / f r e e z e r GEBRAUCHSANWEISUNGEN INSTRUCTION MANUAL EUN 12500 2222724-92...
-
Seite 2: Inhaltsverzeichnis
INHALT Hinweise zur Tipps Verpackungsentsorgung Tipps für das Einfrieren Tipps für Tiefkühlkost Warnungen und Wartung und Pflege wichtige Hinwese Abtauen Für den Benutzer Regelmäßige Reinigung Stillstandszeiten Gebrauch Kundendienst und Ersatzteile Reinigung der Innenteile Bedienungsblende Für den Installateur Inbetriebnahme Temperatureinstellung Technische Angabe Schnellgefriervorgang Installation Alarmlampe/Temperaturalarm... -
Seite 3: Warnungen Und Wichtige Hinweise
WARNUNGEN UND WICHTIGE HINWEISE Es ist sehr wichtig, daß diese Bedienungsanleitung mit dem betreffenden Gerät aufbewahrt wird. Sollte dieses Gerät verkauft bzw. einer anderen Person gegeben werden, so ist es nötig, die Anleitung beizufügen, damit der neue Kunde über den Betrieb des Gerätes bzw. die entsprechenden Warnungen informiert werden kann. - Seite 4 In allen Kühl- und Gefriergeräten bedecken sich im Laufe der Zeit alle kälteführenden Teile mit einer Umweltnormen Reif bzw. Eisschicht. Diese Schicht wird je nach Dieses Gerät enthält im Kühlkreislauf und in der Modell automatisch oder mit der Hand abgetaut. Isolierung kein ozonschädigendes Gas.
-
Seite 5: Gebrauch
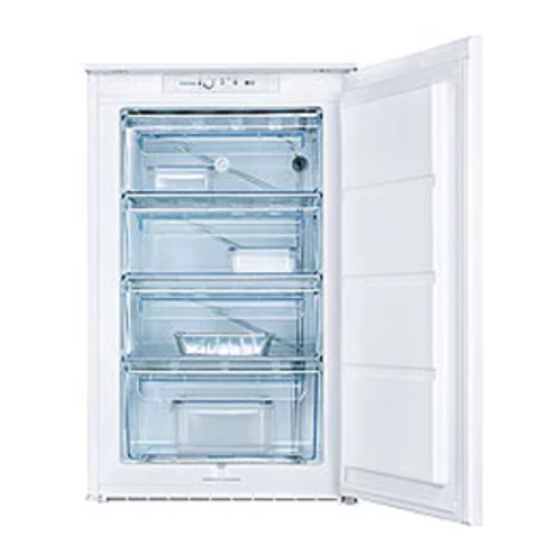
GEBRAUCH Dieses Gerät ist mit dem «Viersterne» Symbol versehen, was bedeutet, daß darin sowohl frische Lebensmittel eingefroren als auch Tiefkühlkost langfristig gelagert werden können. Reinigung der Innenteile Bevor Sie das Gerät in Betrieb nehmen, beseitigen Sie den typischen «Neugeruch» am besten durch Auswaschen der Innenteile mit lauwarmem Wasser und einem neutralen Reinigungsmittel. -
Seite 6: Schnellgefriervorgang
Schnellgefriervorgang Nach der Einlagerung der Lebensmittel, rechnet man 24 Stunden, bis der Gefriervorgang beendet ist. Nach Zur Durchführung des Schnellgefriervorganges die ➃ ➃ ➂ ➂ dieser Zeit den «Aufbewahrungs- Betrieb» wieder Schnellgefriertaste drücken. Die Kontrollampe einstellen. leuchtet auf. Die einzufrierenden Lebensmittel in die beiden Wird die Schnellgefrier-Funktion nicht manuell oberen Fächer des Gerätes einlegen;... -
Seite 7: Auftauen
Auftauen Eiswürfelbereitung Das Gerät hat eine oder mehrere Eiswürfelschalen, Die eingefrorenen oder tiefgekühlten Lebensmittel welche mit Wasser aufgefüllt in das Gerät gestellt sollten vor dem Gebrauch aufgetaut werden, indem werden. man sie am besten im Kühlschrank oder je nach der Bitte zur Entnahme der Eiswürfelschalen zur Verfügung stehenden Zeit bei Raumtemperatur keine Metallgegenstände benutzen! -
Seite 8: Abtauen
Abtauen Im Gefrierschrank muß die Reifschicht jedesmal mit dem beiliegenden Plastikschaber abgekratzt werden, sobald diese eine Stärke von ca. 4 mm erreicht hat. Hierzu ist es nicht nötig, das Gerät auszuschalten bzw. die Lebensmittel herauszunehmen. Benutzen Sie kein mechanisches oder anderes Mittel für einen schnelleren Abtauprozeß... -
Seite 9: Kundendienst Und Ersatzteile
KUNDENDIENST UND ERSATZTEILE Falls das Gerät Störungen aufweisen sollte, überprüfen Sie zuerst folgendes: Störung Abhilfe Im Gerät wird es nicht kalt genug - Ist die Temperatur auf schwach eingestellt? - Wurde zu warmes Gut eingelagert? - Wurde zu viel auf einmal eingelagert? - Sind die Waren richtig eingelagert, damit die abgekühlte Luft ausreichend zirkulieren kann? - Ist die Tür richtig geschlossen? -
Seite 10: Aufstellung
Aufstellung Türanschlagwechsel Das Gerät sollte nicht in der Nähe von Wärmequellen Zur Transportsicherung wurde die Gerätetür an wie Heizkörpern oder Öfen aufgestellt und vor beiden Auschlagseiten mit Scharnierstiften befestigt. direkter Sonneneinstrahlung geschützt werden. Je nach Türanschlag, Scharnierstift auf einer Seite Die beste Leistung erzielt man erfahrungsgemäß... - Seite 11 50 mm min. 200 cm D526 3. Tür öffnen und Gerät gegenüber der Bandseite an Gründen Sicherheit muss eine die Möbelseitenwand rücken. Gerät mit den 4 Mindestbelüftung gesichert sein, wie aus der beiliegenden Schrauben (I) befestigen. Abb.hervorgeht. Achtung: Die Ventilations - Öffnungen müssen immer saubergehalten werden.
- Seite 12 Gerätetür und Möbeltür zusammenhalten und die Bohrlöcher anzeichnen (siehe Abb.). ca. 50 mm 90° 90° ca. 50 mm 6. Die Schiene (Ha) auf der Innenseite der Möbeltür oben und unten auflegen (siehe Abb.) und die Position der äußeren Bohrlöcher anzeichnen. Nachdem die Löcher gebohrt wurden, die Schiene mit den mitgelieferten Schrauben befestigen.
- Seite 13 CONTENTS Instructions for the User Instructions for the Installer Important Safety Instructions Technical specifications Installation Positioning Cleaning the interior Electrical connection Control panel Door reversal Operation Instructions for totally built-in appliances Temperature regulation Quick freezing Warning light Acoustic alarm Freezing calendar Freezing of fresh foods Storage of commercially frozen food Thawing...
-
Seite 14: Important Safety Instructions
IMPORTANT SAFETY INSTRUCTIONS It is most important that this instruction book should be retained with the appliance for future reference. Should the appliance be sold or transferred to another owner, or should you move house and leave the appliance, always ensure that the book is supplied with the appliance in order that the new owner can be acquainted with the functioning of the appliance and the relevant warnings. -
Seite 15: Environment Protection
Attention: keep ventilation openings clear of obstruction. Environment Protection If the appliance is transported horizontally, it is This appliance does not contain gasses which possible that the oil contained in the compressor could damage the ozone layer, in either its flows in the refrigerant circuit. -
Seite 16: Use
The freezer is marked with the symbol, which means that the compartment is suitable for freezing fresie food and long-term storage of frozen food. Cleaning the interior Before using the appliance for the first time, wash the interior and all internal accessories with lukewarm water and some neutral soap so as to remove the typical smell of a brand-new product, then dry thoroughly. -
Seite 17: Quick Freezing
Quick freezing In the top compartment, products must only be stacked up to the mark on the cabinet wall so as to ➃ ➃ ensure that air circulation is not obstructed. For quick-freezing, push the button . The super ➂ ➂ The maximum amount of food which is freezable control light will then light up. -
Seite 18: Tips
TIPS Tips for freezing fresh foods In addition, never put hot foods or liquids in the freezer compartment and take care not to ½ll recipients up to the brim if they are covered with a To help you get the best out of the freezing process, lid. -
Seite 19: Something Not Working
To carry out complete defrosting proceed as follows: 1. Remove any stored food, wrap it in several layers of newspaper and put it in a cool place. ➁ ➁ 2. Turn the thermostat control knob to the « » setting. 3. -
Seite 20: Technical Information
If your appliance is still not working properly after making the above checks, contact the nearest service centre. To obtain fast service, it is essential that when you apply for it you specify the model and serial number of your appliance which can be found on the guarantee certificate or on the rating plate located inside the appliance, on the bottom left-hand side. -
Seite 21: Instructions For Totally Built-In Appliances
Instructions for totally built-in appliances Dimensions of the recess Height of housing mm 880 Depth of housing mm 550 Width of housing mm 560 D132 2. Apply joint the sealing strip as shown in figure. PR 32 It is necessary that the niche is provided with a conduct of ventilation having the following dimensions: Depth 50 mm... - Seite 22 PR266 PR167 5. Separate parts Ha, Hb, Hc, Hd as shown in the 8. Open the appliance door and the furniture door at figure. 90°. Insert the small square (Hb) into guide (Ha). Put together the appliance door and the furniture door and mark the holes as indicated in the figure.
- Seite 23 PR167/1 11. Fix cover (Hd) on the small square (Hb) until it clips into place.
- Seite 24 ELECTROLUX HOME PRODUCTS OPERATIONS EUROPE...