
Verwandte Anleitungen für Indesit HGK 150.B


Inhaltszusammenfassung für Indesit HGK 150.B
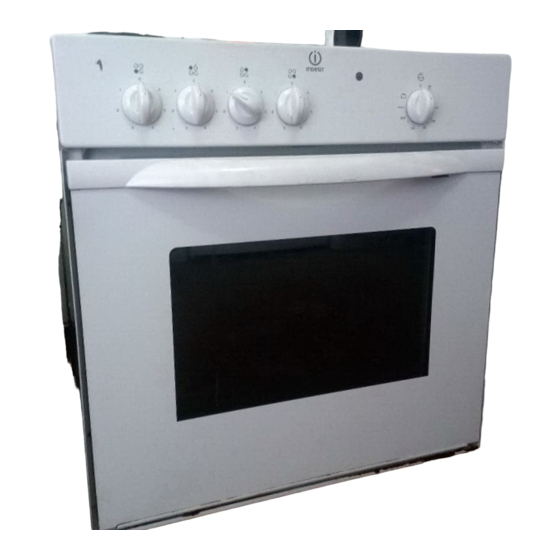
- Seite 1 Built-in cooker HGK 150.B Installation and use HGK 150.B IX Cuisinière à encastrer Installation et emploi Elektrische inbouw-oven Installatie en gebruik Elektro Einbauherde Installation und Gebrauch...
- Seite 2 Built-in electric cooker Instructions for installation and use Cuisinière électrique encastrable Instruction pour l’installation et l’emploi Elektrische Inbouwkeuken Gebruiksaanwijzingen voor de plaatsing en gebruik Einbau-Elektroherde Informationen für installation un gebrauch...
-
Seite 3: How To Use Your Oven
Congratulations on choosing an Indesit appliance, which you will find is dependable and easy to use. We recommend that you read the instructions in this owner’s manual carefully before use for the best performance and to extend the life of your appliance, as it will provide you with all the instructions you require to ensure its safe installation, use and maintenance. - Seite 4 the red boss in the centre of the same, and the automatic Using the hob hotplates by the smaller circular aluminium plate in their To get the best from your hob, here are a few helpful tips centre). to keep in mind during cooking or when preparing food. To avoid any heat loss and damage to the hotplates, we Use flat-bottomed pans to ensure the same adhere advise you to use pans with a flat bottom, whose diameter...
- Seite 5 How to Keep Your Oven in Shape How to remove the oven door Before cleaning your oven, or performing maintenance, For a more thorough clean, you can remove the oven disconnect it from the power supply. door. Proceed as follows: To extend the life of your oven, it must be cleaned •...
-
Seite 6: Practical Cooking Advice
Practical Cooking Advice Using the Grill When cooking in the oven, use only one dripping pan or Use the “grill” mode, placing the food under the cen- rack at a time. Select from among the top or bottom rack tre of the grill (situated on the 3rd or 4th rack form the heights based on whether the dish needs more or less bottom) because only the central part of the top heating heat from the top. - Seite 7 Foods Cooking position Temperature Pre-eating time Cooking time (Kg) from bottom (°C) (minuts) (minuts) Paste Lasagne 75-80 Cannelloni 75-80 Oven-baked noodles 75-80 Meat Veal 85-90 Chicken 110-115 Turkey 220-Max 95-100 Duck 120-125 Rabbit 105-110 Pork 100-110 Lamb 90-95 Fish Mackerel 210-230 55-60 Dentex...
- Seite 8 Safety Is A Good Habit To Get Into To maintain the efficiency and safety of this appliance, we recommend that you do the following: • only call the Service Centres authorised by the manufacturer • always use original spare parts •...
- Seite 9 Instalation The appliance must be installed only by a qualified person in compliance with the instructions provided. The manufacturer declines all responsibility for improper installation which may harm persons and animals and damage property. Important: The power supply to the appliance must be cut off before any adjustments or maintenance work is done on it.
- Seite 10 Connecting the supply cable to the mains 400V 3N~ Install a standardised plug corresponding to the load indi- H05RR-F 5x2.5 CEI-UNEL 35363 cated on the data plate. When connecting the cable di- rectly to the mains, install an omnipolar circuit-breaker with a minimum contact opening of 3 mm between the appli- ance and the mains.
-
Seite 11: Technical Specifications
Technical Specifications Inner dimensions of the oven: Voltage and Frequency of Power Supply: Width 43.5 cm 230V/400V ~ 3N 50/60Hz 8200W Depth 43.5 cm Height 32 cm Inner Volume of the Oven: 60 litres This appliance conforms with the following ENERGY LABEL European Economic Community directives: Directive 2002/40/EC on the label of electric ovens... - Seite 12 Merci d’avoir choisi un produit Indesit, fiable et facile à utiliser. Pour apprendre à bien connaître votre appareil, à l’utiliser et à le conserver longtemps, lisez attentivement cette notice avant toute utilisation car elle contient des instructions très importantes concernant sa sécurité d’installation, d’usage et d’entretien. Conservez avec soin cette brochure pour toute consultation ultérieure.
- Seite 13 Manettes de commande des plaques électriques du Voyant fonctionnement plaques électriques (G) plan de cuisson (F) Il s’allume chaque fois qu’une résistance électrique du Les cuisinières peuvent monter des plaques électriques plan de cuisson se met en marche. normales, rapides et automatiques combinées entre elles Utilisation du plan de cuisson (les plaques rapides se distinguent des autres à...
- Seite 14 Comment le garder en forme Dépose de la porte du four Avant toute opération de nettoyage ou d’entretien coupez Pour nettoyer plus à fond, vous pouvez déposer la porte l’alimentation électrique de l’appareil. du four. Procédez comme suit : Pour prolonger la durée de vie de votre appareil, net- •...
-
Seite 15: Conseils Utiles Pour La Cuisson
Conseils utiles pour la cuisson Utilisation du gril Pour cuire au four, n’utilisez qu’une seule lèchefrite ou Utilisez la fonction “gril” en plaçant vos aliments au grille à la fois. Placez-la sur les gradins du bas ou du haut milieu de la grille (placée au 3ème ou au 4ème niveau en selon que la cuisson exige plus de chaleur provenant de partant du bas) car seule la partie centrale de la résis- la voûte ou de la sole. - Seite 16 Aliments à cuire Poids Position de Température Temps de pré- Temps de (Kg) cuisson étages à (°C) réchauffement cuisson partir du bas (minutes) (minutes) Pâtes Lasagnes 75-80 Cannelloni 75-80 Tagliatelle au four 75-80 Viandes Veau 85-90 Poulet 110-115 Dinde 220-Max 95-100 Canard 120-125...
- Seite 17 La sécurité, une bonne habitude Pour garantir l’efficacité et la sécurité de ce produit • adressez-vous exclusivement à des Centres d’assistance technique agréés • exigez toujours l’utilisation de pièces détachées originales. • Pour déplacer l’appareil servez-vous toujours des d’utiliser des adaptateurs, des prises multiples et/ou des poignées prévues sur les côtés du four, vous rallonges ;...
-
Seite 18: Installation
INSTALLATION L’installation doit être effectuée conformément aux instructions du fabricant et par un professionnel du secteur. Le fabricant décline toute responsabilité pour tous dommages causés à des personnes, à des animaux ou à des choses du fait d’une installation incorrecte de l’appareil. - Seite 19 • pour effectuer les raccordements électriques illustrés Branchement du câble d’alimentation au réseau fig. F et fig. G, utilisez les deux pontets placés dans le électrique boîtier (fig. E - référence “P”) Montez sur le câble une fiche normalisée pour la charge •...
-
Seite 20: Caractéristiques Techniques
Caractéristiques Techniques Dimensions utiles du four: Tension et fréquence d’alimentation : 230V/400v ~ 3N 50/60Hz 8200W largeur : cm 43,5 profondeur : cm 43,5 hauteur : cm 32 Volume utile du four: litres 60 Cet appareil est conforme aux Directives ETIQUETTE ENERGIE Communautaires suivantes : Directive 2002/40/CE sur l’étiquette des fours électriques... -
Seite 21: Het Gebruik
Wij danken u dat u een Indesit product heeft gekozen, veilig en gemakkelijk in het gebruik. Teneinde de oven beter te leren kennen, beter te gebruiken en er langer plezier van te hebben raden wij u aan de gebruiksaanwijzing aandachtig te lezen voordat u hem voor de eerste keer gaat gebruiken, er staan belangerijke aanwijzingen in met betrekking op de veiligheid van installeren, het gebruik en onderhoud. - Seite 22 vooral cakes die moeten rijzen hetgeen door onderwarmte Controlelampje elektrische kookplaten (G) wordt vergemakkelijkt. De hogere temperaturen worden Dit blijft aan zolang er een elektrisch verwarmingselement in langere tijd bereikt waardoor in deze gevallen de func- aan is. tie “Statische Oven “ wordt gebruikt. Gebruik van de kookplaat Het ovenlicht Voor de beste resultaten van uw kookplaat volgen hier...
- Seite 23 Onderhoud Sluit altijd eerst de stroom af voordat u tot enige handeling over- Het verwijderen van de ovendeur gaat. Voor een grondige reiniging kunt u de ovendeur verwijderen. Ga Het is belangrijk voor de lange duurzaamheid van het ap- als volgt te werk: paraat dat u het regelmatig nauwkeurig schoonmaakt, als •...
- Seite 24 Kooktips Gebruik in de oven slechts één bakplaat of ovenrek tege- Buitenkant goed, maar van binnen niet gaar lijkertijd. Deze wordt hoger of lager geplaatst naar gelang het gerecht meer bovenwarmte of meer onderwarmte no- Maak deeg minder vloeibaar, verlaag de temperatuur, dig heeft.
- Seite 25 Te koken voedsel Gewicht Positie van koken Temperatuur Tijd van Tijd van (Kg.) verdiepingen van (°C) voorverwarming koken beneden (min.) (min.) Paste Lasagne 75-80 Cannelloni 75-80 Tagliatelle 75-80 Vlees Kalfsvlees 85-90 110-115 Kalkoen 220-Max 95-100 Eend 120-125 Konijn 105-110 Varkensvlees 100-110 Schaapsvlees 90-95...
- Seite 26 Veiligheid is een goede gewoonte Voor het garanderen van de efficiëntie en veiligheid van het apparaat: • Wendt u zich alleen tot een erkend technisch service center • Vereis altijd originele onderdelen • Maak gebruik van de handgrepen aan de zijkanten het gebruik van adapters, verlengsnoeren en/of dubbel- van de oven als u het apparaat moet verplaatsen, stekkers;...
- Seite 27 INSTALLATIE Het installeren moet uitgevoerd worden door een be- voegde installateur en volgens de instrukties van de fabrikant. Een verkeerde aansluiting kan schade veroor- zaken aan personen, dieren of dingen en voor deze ge- vallen kan de fabrikant niet verantwoordelijk worden ge- steld.
- Seite 28 overbruggingsklemmen die zich in de doos bevinden Het aansluiten van de voedingskabel aan het net gebruikt (afb. E - kenteken “P”) Bevestig een stekker op de voedingskabel, die geschikt • zet de kabel vast in de kabelklem en sluit de deksel. is voor de lading die aangegeven wordt op het typeplaatje.
-
Seite 29: Technische Gegevens
Technische gegevens Afmetingen van de oven: Voltage en frekwentie van de stroomverzorging: breedte : 43,5 cm 230/400V ~ 3N 50/60Hz 8200W diepte: 43,5 cm hoogte: 32 cm Inhoud van de oven: 60 liters Dit apparaat voldoet aan de volgende EEG ENERGY LABEL Richtlijnen: Richtlijn 2002/40/CE op etiket van de elektrische ovens... -
Seite 30: Aus Der Nähe Betrachtet
Wir danken Ihnen, dass Sie dieses sichere und äußerst leicht zu bedienende Indesit-Gerät gewählt haben. Um sich mit diesem vertraut zu machen und es auf optimale Art zu gebrauchen lernen, empfehlen wir Ihnen, dieses Handbuch vor Inbetriebnahme des Gerätes aufmerksam zu lesen, da es wichtige Hinweise hinsichtlich der Sicherheit bei der Installation, dem Gebrauch und der Wartung liefert. - Seite 31 Backofenbeleuchtung Elektroplatten-Betriebsanzeigeleuchte (G) Diese schaltet sich ein, sobald irgendein Kochfeld- Diese wird durch Drehen des Knopfes „E“ auf das Symbol Heizelement in Betrieb gesetzt wird. eingeschaltet. Sie beleuchtet das Ofeninnere und bleibt einge- schaltet, solange sich irgendein elektrisches Einsatz des Kochfeldes Backofenheizelement in Betrieb befindet.
-
Seite 32: So Halte Ich Das Gerät In Topform
So halte ich das Gerät in Topform Vor jeder Reinigung und Pflege muß das Gerät vom Strom- Abnehmen der Backofentür netz getrennt werden. Um den Backofen mühelos gründlich reinigen zu können, Um eine lange Lebensdauer des Backofens zu gewähr- kann die Backofentür abgenommen werden. Verfahren Sie leisten, muß... -
Seite 33: Praktische Back-/Brathinweise
Praktische Back-/Brathinweise Backen Verwenden Sie bei Garen im Backofen immer nur ein Back- Bevor Sie Kuchen in den Backofen geben, ist der Back- blech bzw. Rost. Schieben Sie dieses entweder auf die ofen stets vorzuheizen. Um zu vermeiden, dass der Ku- unteren oder auf die oberen Führungsschienen, je nach chen zusammenfällt, sollte die Backofentür während des dem, ob mehr Ober- oder mehr Unterhitze verlangt wird. - Seite 34 Zu kochende Gerichte Gewicht Kochstellung Thermo-stats- Ankochzeit (min) Kochzeiten (Kg) Etagen von unten tellung (min) (°C) Teigwaren Lasagne 75-80 Cannelloni 75-80 Bandnudeln 75-80 Fleisch Kalb 85-90 Huhn 110-115 Trufhahn 220-Max 95-100 Ente 120-125 Kaninchen 105-110 Schwein 100-110 Lamm 90-95 Fisch Makrelen 210-230 55-60...
-
Seite 35: Die Sicherheit - Eine Gute Gewohnheit
Die Sicherheit - Eine gute Gewohnheit Um die Leistungsfähigkeit und Sicherheit dieses Gerätes zu gewährleisten, bitte folgendes beachten: • wenden Sie sich ausschließlich an unsere anerkannten Kundendienst-Zentren • verlangen Sie, dass nur Original-Ersatzteile verwendet werden. • Bedienen Sie sich zur Positionsveränderung des den Einsatz von Adaptern, Vielfachsteckdosen und/ Geräts stets der an den Seiten des Ofens oder Verlängerungen;... - Seite 36 INSTALLIERUNG Die Installation ist von Fachpersonal und gemäß den An- weisungen des Herstellers durchzuführen. Eine unsach- gemäße Installation kann zu Schäden an Personen, Tieren oder Gegenständen führen, für die der Hersteller nicht zur Verantwortung gezogen werden kann. Wichtig: Vor jeder Einstellung, Wartung usw. muss der Back- ofen vom Stromnetz getrennt werden.
- Seite 37 • das Versorgungskabel in der entsprechenden Anschluß des Versorgungskabels an das Stromnetz Kabelklemme befestigen und den Deckel schließen. Versehen Sie das Kabel mit einem Normstecker für die auf dem Typenschild angegebene Belastung; wird das Gerät di- 400V 3N~ rekt an das Stromnetz angeschlossen, ist ein allpoliger Schal- H05RR-F 5x2.5 CEI-UNEL 35363 ter mit einer Mindestöffnung von 3 mm, der der Strom- belastung und den geltenden Richtlinien entspricht,...
-
Seite 38: Technische Eigenschaften
Technische Eigenschaften Nutzabmessungen des Backofens: Versorgungsspannung und -frequenz: Breite: cm 43,5 230/400V ~ 3N 50/60Hz 8200W Tiefe: cm 43,5 Höhe: cm 32 Nutzvolumen des Backofens: Liter 60 Dieses Gerät entspricht den folgenden EG- ENERGIE-ETIKETT Richtlinien: Richtlinie 2002/40/CE über die Etikettierung von 73/23/EWG vom19.02.73 (Niederspannung) und Elektrobacköfen nachfolgenden Änderungen;... - Seite 39 • • • • 220 Max...
- Seite 42 " " 10°C. 10°C...
- Seite 43 (Kg.) (°C) (min.) (min.) 75-80 75-80 75-80 85-90 110-115 220-Max 95-100 120-125 105-110 100-110 90-95 210-220 55-60 210-220 60-65 210-220 40-45 30-35 30-35 30-35 45-50 50-55...
- Seite 45 +4 -0 Åðßðåäï åíôïß÷éóçò Ìüíï óå ïñéóìÝíá ìïíôÝëá ËÅÕÊÏ ÊÏÊÊÉÍÏ ÊÉÔÑÉÍÏ ÌÐËÅ ÐÑÁÓÉÍÏ ÊÏÕÆÉÍÁ ÅÍÔÏÉ×ÉÆÏÌÅÍÇ...
- Seite 46 P”) 400V 3N~ H05RR-F 5x2.5 CEI-UNEL 35363 230V 1N~ H07RN-F 3x4 CEI-UNEL 35364 400V 2N~ H05RR-F 4x2.5 CEI-UNEL 35363 L2 L1...
- Seite 47 ENERGY LABEL 230/400V ~ 3N 50/60Hz 8200W...
- Seite 48 Merloni Elettrodomestici Viale Aristide Merloni 47 60044 Fabriano Italy Tel +39 0732 6611 Fax +39 0732 662501 www.merloni.com...