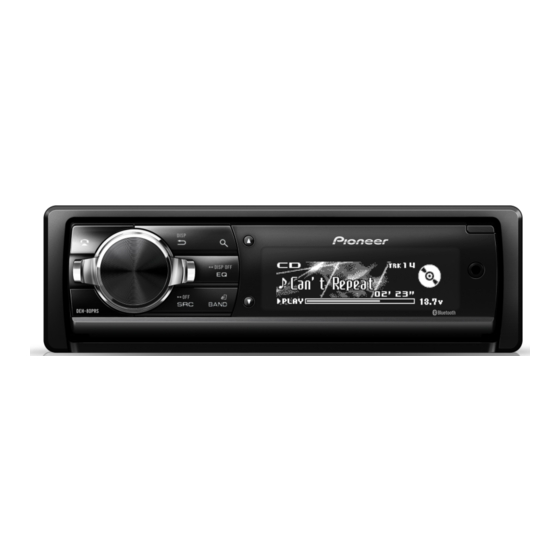
Pioneer DEH-80PRS Installationsanleitung
Vorschau ausblenden
Andere Handbücher für DEH-80PRS:
- Bedienungsanleitung (8 Seiten) ,
- Bedienungsanleitung (61 Seiten)
Inhaltsverzeichnis
Werbung
Verfügbare Sprachen
Verfügbare Sprachen
Quicklinks
CD RDS RECEIVER
AUTORADIO CD RDS
SINTOLETTORE CD RDS
REPRODUCTOR DE CD CON RECEPTOR RDS
CD RDS-EMPFÄNGER
CD RDS-ONTVANGER
CD RDS ПРИЕМНИК
DEH-80PRS
Installation Manual
Manuel d'installation
Manuale d'installazione
Manual de instalación
Installationsanleitung
Installatiehandleiding
Руководство по установке
Werbung
Inhaltsverzeichnis

Verwandte Anleitungen für Pioneer DEH-80PRS


Inhaltszusammenfassung für Pioneer DEH-80PRS
- Seite 1 CD RDS RECEIVER AUTORADIO CD RDS SINTOLETTORE CD RDS REPRODUCTOR DE CD CON RECEPTOR RDS CD RDS-EMPFÄNGER CD RDS-ONTVANGER CD RDS ПРИЕМНИК Installation Manual DEH-80PRS Manuel d’installation Manuale d’installazione Manual de instalación Installationsanleitung Installatiehandleiding Руководство по установке...
-
Seite 2: Power Cord
Also, never connect it to the power terminal 7 Connect leads of the same color to each — Vehicles with a 12-volt battery and negative input2) at the same time, use a Pioneer of the auto antenna. Doing so may result in other. - Seite 3 Section Connections Connections ! If using this system, we recommend that this e ISO connector Standard mode without internal 3-way network mode with In some vehicles, the ISO connector may be unit’s internal amp is turned off. internal amp divided into two. In this case, be sure to con- For details, refer to the operation manual.
-
Seite 4: Installation
Section Connections Installation Important 2 To audio output Use commercially available parts when instal- WARNING 3 Connect with RCA cable (sold separately) ! Check all connections and systems before ling. Do not use the unit in standard mode when a 4 To audio input final installation. -
Seite 5: When Installing The Microphone On The Sun Visor
Section Installation Installing the microphone # Make sure that the unit is installed securely in Insert the supplied extraction keys into CAUTION both sides of the unit until they click into place. An unstable installation may cause skipping It is extremely dangerous to allow the micro- place. -
Seite 6: Adjusting The Microphone Angle
Section Installing the microphone Install the microphone clip on the steer- ing column. 1 Double-sided tape 2 Install the microphone clip on the rear side of the steering column. 3 Clamp Adjusting the microphone angle The microphone angle can be adjusted. -
Seite 8: Cet Appareil
7 Connectez les fils de même couleur en- fage. utilisez un câble USB Pioneer (CD-U50E) — Ne reliez pas le câble jaune à la batterie à tra- en plus du câble standard USB Pioneer. semble. 8 Orange/blanc vers le trou dans le compartiment moteur. - Seite 9 Section Connexions Connexions a Bleu/blanc 9 Haut-parleur d’extrêmes graves Amplificateur de puissance Mode standard sans La position des broches du connecteur ISO amplificateur interne (vendu séparément) Mode réseau de séparation à 3 est différente selon le type de véhicule. Important Connectez a et b lorsque la broche 5 est de voies avec un amplificateur interne Mode standard avec un...
-
Seite 10: Entrée Audio
Section Connexions Connexions 8 Vers la sortie des graves 7 Câble de conversion haut-parleur - RCA Mode réseau de séparation à 3 Entrée audio 9 Haut-parleur de graves (fourni) voies sans amplificateur interne Si vous connectez l’appareil à un périphérique 19 cm Important audio via la sortie RCA ou à... -
Seite 11: Montage Avant/Arrière Din
Section Installation Installation Important ! Quand vous remontez l’anneau de garniture, 4 Vis Montage avant/arrière DIN 5 Vis (M4 × 8) ! Vérifiez toutes les connexions et tous les sys- pointez le côté avec l’encoche vers le bas. Cet appareil peut être installé correctement soit # Assurez-vous que l’appareil est correctement mis tèmes avant l’installation finale. - Seite 12 Section Installation du microphone Installation du microphone Installez le clip microphone sur la colonne PRÉCAUTION de direction. Il est extrêmement dangereux de laisser le fil du microphone s’enrouler autour de la colonne de direction ou du levier de vitesse. Assurez-vous d’installer cet appareil de telle manière qu’il ne gêne pas la conduite.
-
Seite 14: Questa Unità
(12 V CC). trata USB2), oltre al cavo normale USB 7 Collegare insieme i cavi dello stesso colore. surriscaldamento, come le bocchette dell’im- Pioneer utilizzare il cavo USB Pioneer 8 Arancione/bianco pianto di riscaldamento. (CD-U50E). — Non collegare il cavo giallo alla batteria fa- Collegare al terminale dell’interruttore di illu-... - Seite 15 Sezione Collegamenti Collegamenti a Blu/bianco Amplificatore di potenza Per ulteriori dettagli su come modificare le Per ulteriori dettagli su come modificare le La posizione dei pin del connettore ISO sarà impostazioni, vedere il manuale d’istruzioni o impostazioni, vedere il manuale d’istruzioni o (venduto a parte) diversa a seconda del tipo di veicolo.
-
Seite 16: Ingresso Audio
Sezione Collegamenti Collegamenti ! I cavi degli altoparlanti non vengono utilizzati Se si collega l’unità a un car Commutazione delle modalità AVVERTENZA quando si utilizza questa connessione. stereo dotato di un connettore di ingresso RCA Non utilizzare l’unità in modalità standard se a di uscita RCA questa unità... -
Seite 17: Installazione
Sezione Installazione Installazione Importante 1 Dado 2 Linguetta intaccata Montaggio DIN anteriore/ ! La rimozione del frontalino permette di acce- 2 Paratia antifuoco o supporto in metallo ! Controllare tutti i collegamenti e i sistemi posteriore 3 Staffa metallica dere facilmente alla guarnizione. prima dell’installazione finale. -
Seite 18: Installazione Del Microfono
Sezione Installazione del microfono Installazione del microfono Installare la clip del microfono sul pianto- ATTENZIONE ne dello sterzo. È estremamente pericoloso se il filo di sostegno del microfono si avvolge attorno al piantone dello sterzo o alla leva del cambio. Accertarsi quindi di installare questa unità... -
Seite 20: Cable De Alimentación
2) al mismo tiempo, utilice un cable USB — No conecte el cable amarillo a la batería pa- 8 Naranja/blanco Pioneer (CD-U50E) además del cable sándolo a través del orificio hasta el compar- USB Pioneer habitual. Conectar al terminal del interruptor de ilumi- timento del motor. - Seite 21 Sección Conexiones Conexiones a Azul/blanco Amplificador de potencia Modo estándar sin amplificador Modo de red de 3 vías con La posición de las patillas del conector ISO interno amplificador interno (se vende por separado) será diferente según el tipo de vehículo. Co- Importante Importante necte a y b cuando la patilla 5 sea del tipo...
-
Seite 22: Entrada De Audio
Sección Conexiones Conexiones ! Después de realizar el cambio, reinicie el mi- Para más información, consulte el manual Si se conecta la unidad al equipo Cambio entre modos de entrada de funcionamiento o Cambio del modo de croprocesador. de audio de un automóvil con ajuste del DSP en esta página. -
Seite 23: Instalación
Sección Instalación Instalación Importante ! Retire el panel frontal para acceder más fácil- 2 Muro cortafuego o soporte de metal Montaje delantero/posterior 3 Correa metálica ! Compruebe todas las conexiones y sistemas mente al anillo de guarnición. de DIN ! Al volver a colocar el anillo de guarnición, 4 Tornillo antes de la instalación final. -
Seite 24: Instalación Del Micrófono
Sección Instalación del micrófono Instalación del micrófono Instale la abrazadera del micrófono en la PRECAUCIÓN columna de dirección. Es muy peligroso que el cable del micrófono se enrolle alrededor de la columna de dirección o la palanca de cambios. Asegúrese de instalar la unidad de tal forma que no dificulte la conduc- ción. -
Seite 26: Dieses Gerät
USB-Kabel von mit dem Anschluss verbunden wurde, der — Entfernen Sie niemals die Isolierung des die Kabel versehentlich lösen. Pioneer ein weiteres USB-Kabel von für die Erkennung des Zündschlüsselbet- Stromkabels dieses Geräts, um die Stromzu- Pioneer (CD-U50E). - Seite 27 Abschnitt Anschlüsse Anschlüsse 6 Rot e ISO-Anschluss 5 Subwoofer 7 Vorderer Lautsprecher 8 Zum Subwoofer-Ausgang An mit die von der Zündung gesteuerte Bei manchen Fahrzeugtypen kann der ISO- Standardmodus ohne internem 9 Subwoofer Klemme (12 V Gleichspannung) anschließen. Anschluss zweigeteilt sein. Stellen Sie in die- 7 Verbinden Sie jeweils Anschlüsse derselben sem Fall sicher, dass zu beiden Anschlüssen Verstärker...
- Seite 28 Abschnitt Anschlüsse Anschlüsse 6 Weiß: Links + 9 Lautsprecher für niedrigen Frequenzbereich 3-Wege-Netzwerkmodus ohne Audioeingang 7 Lautsprecher-Cinch-Konverter-Kabel (mitge- internem Verstärker Wenn Sie diese Einheit an ein Audio-Gerät mit Umschalten des DSP-Einstellmodus liefert) Wichtig Cinch-Ausgang anschließen oder an eines ohne 19 cm Dieses Gerät verfügt über zwei Betriebsmodi: ! Stellen Sie den DSP-Schalter auf den 3- Cinch-Ausgang, können Sie es so einstellen,...
-
Seite 29: Installation
Abschnitt Installation Installation Wichtig ! Um beim Gebrauch des Geräts eine ord- Befestigen Sie den Montagerahmen mit- DIN-Rückmontage hilfe eines Schraubendrehers: Die Metall- ! Überprüfen Sie vor der endgültigen Installa- nungsgemäße Wärmezerstreuung zu ge- Bestimmen Sie die geeignete Position, klammern sind in eine sichere Position (90°) währleisten, ist bei der Installation genügend tion alle Anschlüsse und Systeme. -
Seite 30: Installieren Des Mikrofons
Abschnitt Installation Installieren des Mikrofons Führen Sie die mitgelieferten Extrak- VORSICHT tionsschlüssel an beiden Geräteseiten ein, Eine Führung des Mikrofonkabels um die Lenk- bis sie in der richtigen Position einrasten. säule oder den Schalthebel kann sich als über- aus gefährlich erweisen. Achten Sie bei der Ziehen Sie das Gerät aus dem Armaturen- Installation des Geräts stets darauf, dass die brett. -
Seite 31: Anpassen Des Mikrofonwinkels
Abschnitt Installieren des Mikrofons Bringen Sie den Mikrofonclip an der Lenksäule an. 1 Doppelseitiges Klebeband 2 Bringen Sie den Mikrofonclip an der Rücksei- te der Lenksäule an. 3 Klammer Anpassen des Mikrofonwinkels Der Mikrofonwinkel kann angepasst werden. - Seite 32 USB-ingang 2) tegelijkertijd zijn aangeslo- — Luidsprekers van 50 W (uitgangswaarde) en accu leeglopen of kan er storing optreden. ten, gebruikt u een Pioneer USB-kabel 4 W tot 8 W (impedantiewaarde). ! De zwarte kabel is de aarding. Dit toestel...
- Seite 33 Hoofdstuk Verbindingen Verbindingen ! Bij deze verbinding worden de luidsprekerka- Wit: Middenbereik links + a Blauw-wit Raadpleeg voor meer informatie over het wij- Wit/zwart: Middenbereik links * De pinpositie van de ISO-connector verschilt zigen van de instelling de bedieningshandlei- bels niet gebruikt. Grijs: Middenbereik rechts + per type voertuig.
- Seite 34 Hoofdstuk Verbindingen Verbindingen Gebruik een dunne schroevendraaier met Als het toestel wordt een platte kop om de DSP-schakelaar op de aangesloten op een autoradio onderzijde van het toestel om te schakelen. zonder RCA-uitgang ...
- Seite 35 Hoofdstuk Installatie Installatie Belangrijk ! Plaats de sierlijst terug met de kant met het 5 Schroef (M4 × 8) DIN-bevestiging voor/achter # Controleer of het toestel stevig op zijn plaats is ! Controleer alle aansluitingen en systemen lipje met de inkeping omlaag. Dit toestel kan via de achterzijde of de voorzijde gemonteerd.
-
Seite 36: De Microfoon Installeren
Hoofdstuk De microfoon installeren De microfoon installeren Plaats de microfoonklem op de stuurko- LET OP lom. Het is zeer gevaarlijk als het snoer van de micro- foon zich om de stuurkolom of de versnellings- pook kan wikkelen. Plaats de microfoon daarom zodanig dat deze het rijden op geen enkele wijze kan belemmeren. -
Seite 38: Шнур Питания
динение может привести к пожару или не- ный через USB-порт 2), необходимо может возникнуть утечка тока аккумуля- питания данного устройства с целью пода- исправности. помимо обычного USB-кабеля Pioneer торной батареи. чи питания на другое устройство. Допусти- использовать также USB-кабель мая нагрузка кабеля по току ограничена. - Seite 39 Раздел Соединения Соединения 5 Красный Зеленый/черный: Задний левый * или 1 Пульт дистанционного управления систе- 1 Пульт дистанционного управления систе- Разъем дополнительного оборудования высокочастотный левый * мой мой (или резервный разъем) Фиолетовый: задний правый + или высо- Подсоедините синий/белый кабель. Подсоедините...
- Seite 40 Раздел Соединения Соединения При подключении устройства к ПРЕДУПРЕЖДЕНИЕ автомобильной аудиосистеме с Если к этому устройству подключена систе- выходом RCA ма громкоговорителей для сетевого режима с 3-сторонней связью, использовать эту си- стему в стандартном режиме нельзя. Это может...
- Seite 41 Раздел Соединения Установка Переключение между режимами Важно ! При установке необходимо обеспечить эффективный отвод тепла, оставив до- входного сигнала RCA ! Перед окончательной установкой про- статочное пространство за задней пане- верьте все соединения и системы. % Чтобы изменить режим входного сиг- лью...
- Seite 42 Раздел Установка Установка Заднее крепление стандарта DIN Закрепите обойму, подогнув с по- Вытяните устройство из приборной мощью отвертки металлические язычки панели автомобиля. Совместите отверстия на кронштейне (90°). и боковых панелях устройства. Снятие и установка передней Затяните по два винта с каждой сторо- ны.
-
Seite 43: Установка Микрофона
Раздел Установка микрофона Установка микрофона Установите держатель микрофона на ВНИМАНИЕ колонке рулевого управления. Не допускайте наматывания провода микро- фона вокруг колонки рулевого управления или рычага переключения передач. Это очень опасно! Установите это устройство таким образом, чтобы оно не затрудняло во- ждение. - Seite 48 FAX: 52-55-5202-3714 先鋒股份有限公司 台北市內湖區瑞光路407號8樓 電話 : 886-(0)2-2657-3588 先鋒電子(香港)有限公司 香港九龍長沙灣道909號5樓 電話 : 852-2848-6488 ã 2011-2016 PIONEER CORPORATION. All rights reserved. ã 2011-2016 PIONEER CORPORATION. Tous droits de reproduction et de traduction réservés. ã PIONEER CORPORATION, 2011-2016. Все права защищены. <KOKZ16E> <CRD4617-B> EW...