Inhaltsverzeichnis
Werbung
Verfügbare Sprachen
Verfügbare Sprachen
Quicklinks
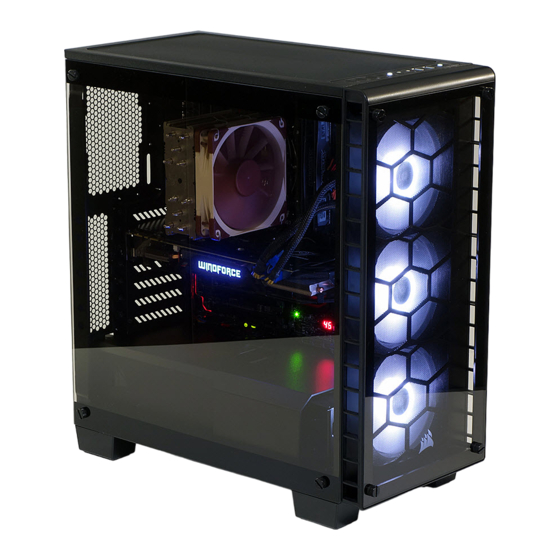
CRYSTAL SERIES
47100 Bayside Parkway • Fremont • California • 94538 • USA | corsair.com
INSTALLATION GUIDE n GUIDE D'INSTALLATION
© 2016 Corsair Components, Inc.
All rights reserved. Corsair and the sails logo are registered
INSTALLATIONSANLEITUNG n Guía de instalación
trademarks of Corsair in the United States and/or other
countries. All other trademarks are the property of their
РУКОВОДСТВО ПО УСТАНОВКЕ n GUIA DE INSTALAÇÃO
respective owners. Product may vary slightly from those pictured.
インストールガイド
PN: 49-001509 rev AA
Werbung
Kapitel
Inhaltsverzeichnis

Verwandte Anleitungen für Corsair Crystal 460X


Inhaltszusammenfassung für Corsair Crystal 460X
- Seite 1 CRYSTAL SERIES 47100 Bayside Parkway • Fremont • California • 94538 • USA | corsair.com INSTALLATION GUIDE n GUIDE D’INSTALLATION © 2016 Corsair Components, Inc. All rights reserved. Corsair and the sails logo are registered INSTALLATIONSANLEITUNG n Guía de instalación trademarks of Corsair in the United States and/or other countries.
- Seite 2 English: ....................5-14 Français: ....................15-24 Deutsch: ....................25-34 Español: ....................35-44 Россию: ....................45-54 Português: ..................55-64 :....................65-74 日本語...
-
Seite 3: Inhaltsverzeichnis
Thank you for purchasing the Crystal Series 460X Tempered Glass, Compact-ATX Mid-Tower PC Case. With its tempered glass front and side panel, the Corsair Crystal Series 460X is a compact and gorgeous ATX case with great cooling potential. Wires and drives are stowed away under a removable two-piece PSU and HDD cover. -
Seite 4: Accessory Kit Contents
CRYSTAL SERIES 460X Accessory Kit Contents Case Features Tempered glass side panel Solid side panel Removable, modular PSU and 3.5” Drive Covers Modular HDD Cage & Sleds Rear SSD mounts AF140L front intake fan AF120L rear exhaust fan CPU backplate cutout, and built-in cable routing cutouts with grommets Cable ties MBD/HDD screws SSD/ODD screws... -
Seite 5: Removing The Side Panels
CRYSTAL SERIES 460X 1. Removing the Side Panels 3. Installing HDDs Remove the thumb screws Step 1 – Place the drive into and pull the side panel off. the 3.5” drive tray. Step 1 Step 2 – Slide the drive and rail assembly into the HDD cage from behind the motherboard as shown. -
Seite 6: Installing The Power Supply
CRYSTAL SERIES 460X 5. Installing the Power Supply 7. Removing the Front Fascia Install the PSU into the Unscrew the front panel, then lower chamber of the case, gently but firmly pull away from and secure with four screws the chassis. from behind. -
Seite 7: Using Rgb Fan Controller (460X - Rgb)
2. Who should I contact if I received my case damaged or one of the fans is no longer working? Please go to corsair.force.com and request an RMA so that we can replace the damaged part(s). 3. Where can I mount a fan? - Seite 8 Merci d'avoir acheté le boîtier d'ordinateur PC ATX tour moyenne compacte en verre trempé Crystal Series 460X. Avec ses panneaux avant et latéral en verre trempé, le Corsair Crystal Series 460X est un splendide boîtier ATX compact possédant une capacité de refroidissement supérieure.
-
Seite 9: Contenu Du Kit D'accessoires
CRYSTAL SERIES 460X Contenu du kit d’accessoires Caractéristiques du boîtier Panneau latéral en verre trempé Panneau latéral plein Capots de bloc d'alimentation et de disque de 3,5” modulaires amovibles Cage et traîneaux de disque dur modulaires Fixations de SDD arrière Ventilateur aspirant avant AF140L Ventilateur d'évacuation arrière AF120L Panneau découpé... -
Seite 10: Installation De La Carte Mère
CRYSTAL SERIES 460X 1. Enlever les panneaux latéraux 3. Installation des disques durs Enlevez les vis de serrage et Étape 1 – Positionnez le disque sur tirez le panneau latéral. le plateau pour disque de 3,5". Étape 1 Étape 2 – Faites glisser le disque et le rail dans la cage de disque dur depuis l'arrière de la carte mère, comme indiqué. -
Seite 11: Installation Du Bloc D'alimentation
CRYSTAL SERIES 460X 5. Installation du bloc d'alimentation 7. Enlever le panneau avant Installez le bloc d'alimentation Dévissez le panneau avant, dans la chambre inférieure puis retirez-le doucement mais du boîtier et fixez à partir de fermement du boîtier. l'arrière à l'aide de quatre vis. 6. -
Seite 12: Utilisant Le Contrôleur De Ventilateur Rvb (460X - Rvb)
2. À qui dois-je m’adresser si mon boîtier est endommagé à l’arrivée ou lorsqu’un ventilateur ne fonctionne plus? Veuillez vous rendre sur le site corsair.force.com et demandez une RMA (autorisation de retour de marchandise) pour que nous puissions remplacer la ou les pièces endommagées. -
Seite 13: Technische Daten Des Gehäuses
Tower-PC-Gehäuse Crystal Series 460X mit gehärtetem Glas entschieden haben. Das Corsair Crystal Series 460X ist mit Front- und Seitenteilen aus gehärtetem Glas ein kompaktes und attraktives ATX-Gehäuse mit großem Kühlungspotenzial. Kabel und Laufwerke werden unter einer abnehmbaren zweiteiligen Netzteil- und HDD-Abdeckung verstaut. -
Seite 14: Inhalt Des Zubehörkits
CRYSTAL SERIES 460X Inhalt des Zubehörkits Funktionsmerkmale des Gehäuses Seitenteil aus gehärtetem Glas Massives Seitenteil Modulare, abnehmbare Netzgerät- und 3,5”-Laufwerksabdeckungen Modularer HDD-Käfig & Schlitten Rückseitige SSD-Montagepunkte Vorderseitiger AF140L Ansauglüfter Rückseitiger AF120L Abluftventilator CPU-Öffnung in der Rückwand und integrierte Kabelführung mit Kabeldurchführungen Kabelbinder MBD/HDD-Schrauben SSD/ODD-Schrauben... -
Seite 15: Abnehmen Der Seitenteile
CRYSTAL SERIES 460X 1. Abnehmen der Seitenteile 3. Installation von HDD-Laufwerken Entfernen Sie die Schritt 1 – Schieben Sie das Rändelschrauben und nehmen Laufwerk in den Einschub für Sie das Seitenteil ab. 3,5-Zoll-Laufwerke. Schritt 1 Schritt 2 – Schieben Sie das Laufwerk und die Schieneneinheit wie abgebildet hinter dem Motherboard in den HDD-Käfig. -
Seite 16: Installation Des Netzteils
CRYSTAL SERIES 460X 5. Installation des Netzteils 7. Entfernen der Frontplatte Installieren Sie das Netzteil Lösen Sie die Schrauben der in der unteren Kammer des Frontplatte und ziehen Sie sie Gehäuses und sichern Sie es dann vorsichtig mit Kraft vom von hinten mit vier Schrauben. -
Seite 17: Verwenden Der Rgb-Lüftersteuerung (460X - Rgb)
2. An wen kann ich mich wenden, wenn ich ein beschädigtes Gehäuse erhalten habe oder einer der Lüfter nicht mehr funktioniert? Gehen Sie zu corsair.force.com und fordern Sie eine RMA an, damit wir die beschädigten Teile ersetzen können. 3. Wo kann ich einen Lüfter anbringen? Punkte für Lüfterhalterungen... - Seite 18 Gracias por comprar el chasis ATX compacto semitorre de vidrio templado Crystal Series 460X. Gracias a los paneles frontal y lateral de vidrio templado, Corsair Crystal Series 460X es un chasis ATX compacto y atractivo con gran potencial de refrigeración. Los cables y las unidades se almacenan debajo de una cubierta extraíble de dos piezas del disco duro y la...
-
Seite 19: Contenido Del Conjunto De Accesorios
CRYSTAL SERIES 460X Contenido del conjunto de accesorios Características del chasis Panel lateral de vidrio templado Panel lateral sólido PSU modular y extraíble, cubiertas de unidades de 3,5 pulg. Jaula y guías de la unidad HDD modular Monturas traseras de la unidad SDD Ventilador de entrada frontal AF140L Ventilador de salida trasero AF120L Orificio en la placa posterior de la CPU y orificios incorporados... -
Seite 20: Cómo Instalar La Placa Base
CRYSTAL SERIES 460X 1. Cómo extraer los paneles laterales 3. Cómo instalar unidades HDD (disco duro) Desenrosque los tornillos de Paso 1 – Coloque la unidad pulgar y quite el panel lateral. en la bandeja para unidades de 3,5 pulg. Paso 1 Paso 2 –... -
Seite 21: Cómo Instalar La Fuente De Alimentación
CRYSTAL SERIES 460X 5. Cómo instalar la fuente de alimentación 7. Cómo extraer el panel frontal Instale la PSU en la cámara Desatornille el panel frontal inferior del chasis y asegúrela y luego extráigalo del chasis, con cuatro tornillos en la lentamente pero con firmeza. -
Seite 22: Cómo Utilizar El Controlador De Ventiladores Rgb (460X - Rgb)
2. ¿Con quién me debo poner en contacto si recibo mi chasis dañado o uno de los ventiladores ya no funciona? Por favor, diríjase a corsair.force.com y pida un RMA para que podamos reemplazar las piezas dañadas. 3. ¿Dónde puedo montar un ventilador? - Seite 23 компактного компьютерного корпуса ATX формата Mid Tower. с панелями из закаленного стекла. Великолепный компактный корпус ATX Corsair Crystal Series 460X, оснащенный боковой и передней панелями из закаленного стекла, отличается превосходными характеристиками с точки зрения охлаждения. Провода и диски спрятаны под съемной двухкомпонентной...
-
Seite 24: Содержимое Комплекта Аксессуаров
CRYSTAL SERIES 460X Содержимое комплекта аксессуаров Особенности корпуса Боковая панель из закаленного стекла Цельная боковая панель Съемные модульные крышки блока питания и 3,5-дюймового диска Модульные держатели и салазки для жестких дисков Задние крепления для твердотельных накопителей Передний приточный вентилятор AF140L Задний... -
Seite 25: Снятие Боковых Панелей
CRYSTAL SERIES 460X 1. Снятие боковых панелей 3. Установка жестких дисков Ослабьте и снимите винты с Шаг 1 – Поместите диск в отсек рифленой головкой, после чего для 3,5-дюймовых дисков. сдвиньте боковую панель. Шаг 1 Шаг 2 – Задвиньте диск и блок направляющих... -
Seite 26: Установка Блока Питания
CRYSTAL SERIES 460X 5. Установка блока питания 7. Снятие передней панели Установите блок питания в нижней Ослабьте и снимите винты передней камере корпуса и закрепите снизу панели, после чего осторожно, но с четырьмя винтами. усилием сдвиньте ее с корпуса. 6. Установка карт PCI-E/PCI 8. -
Seite 27: Сверху
Нет, она важна только для светодиодных разъемов. 2. К кому следует обратиться, если корпус получен поврежденным или один из вентиляторов больше не работает? Перейдите на веб-сайт corsair.force.com и запросите разрешение на возврат материалов (RMA), чтобы мы смогли заменить поврежденные детали. - Seite 28 CRYSTAL SERIES 460X Índice Especificações do gabinete Parabéns: ..................................55 Comprimento: ..................440mm Especificações do gabinete: ..........................56 Largura: ....................220mm Conteúdo do kit de acessórios: ..........................57 Altura: ....................... 464mm Recursos do gabinete: ............................58 Remover os painéis laterais: ..........................59 Comprimento máximo da GPU: ............. 370mm Instalar a placa-mãe: ...............................59 Altura máxima da ventoinha da CPU: .........
-
Seite 29: Conteúdo Do Kit De Acessórios
CRYSTAL SERIES 460X Conteúdo do kit de acessórios Recursos do gabinete Painel lateral em vidro temperado Painel lateral sólido Tampas de unidades de 3,5" e PSU modulares e removíveis Trenós e compartimentos do HDD modulares Montagens de SSD traseiras Ventoinha de entrada frontal AF140L Ventoinha de exaustão traseira AF120L Abertura na placa traseira da CPU e aberturas do roteamento de cabos com apoios internos... -
Seite 30: Remover Os Painéis Laterais
CRYSTAL SERIES 460X 1. Remover os painéis laterais 3. Instalar HDDs Remova os parafusos de Passo 1 – Coloque a unidade suporte e puxe o painel lateral. na bandeja de unidades de 3,5". Passo 1 Passo 2 – Deslize a unidade e o conjunto do trilho para o compartimento do HDD 400C_400Q STEP 3... -
Seite 31: Instalar A Fonte De Alimentação
CRYSTAL SERIES 460X 5. Instalar a fonte de alimentação 7. Remover o painel dianteiro Instale a PSU na câmara Desaparafuse o painel frontal inferior do gabinete e fixe-a e, em seguida, retire-o com quatro parafusos por trás. cuidadosamente do chassi. 6. -
Seite 32: Usar O Controlador Da Ventoinha Rgb (460X - Rgb)
Não, apenas as hastes do LED. 2. Quem devo contatar caso receba meu gabinete danificado ou uma das ventoinhas não estiver mais funcionando? Acesse corsair.force.com e solicite um RMA, para que possamos substituir a(s) peça(s) danificada(s). 3. Onde posso montar uma ventoinha? Montar um fã... - Seite 33 背部: ....................120mm RGB ファンコントローラ (460X - RGB) の使用: ....................73 よくあるご質問: ................................74 Congratulations! 220mm 440mm Crystal Series 460X - 強化ガラス、コンパクト ATX ミッドタワー PC ケースをご購入いただき、ありがとうございます。 強化ガラスのフロントとサイドパネルを持つ Corsair Crystal Series 460X は、優れた冷 却機能を備えたコンパクトで美しい ATX ケースです。ワイヤーとドライブは、取り外し 可能ツーピース電源ユニットおよび HDD カバーの下に収納されます。Direct Airflow パ ス設計により、ファンは使用していないドライブケージに風を送り込む必要がなく、最も 熱くなるコンポーネントに風を送って静音と冷却を実現します。...
-
Seite 34: アクセサリーキットの内容
CRYSTAL SERIES 460X アクセサリーキットの内容 ケースの特徴 強化ガラスサイドパネル ソリッドサイドパネル 取り外し可能モジュラー電源ユニットと 3.5 インチドライブカバー モジュラー HDD ケージおよびスレッド リア SSD 用マウント AF140L フロント吸気ファン AF120L リア排気ファン CPU バックプレートホール、内蔵ケーブル配線用ホールおよびグロメット SSD/光学ドライブ用 ケーブル結束バンド マザーボード/HDD 用 ダストフィルター ネジ ネジ トップカバー フロント I/O パネル (x2 USB 3.0, ヘッドフォン、マイク、電源、リセット) 拡張スロット (x7) 取り外し可能な強化ガラス前面パネル (x3) SP120 RGB LED ファン... -
Seite 35: サイドパネルの取り外し
CRYSTAL SERIES 460X 1. サイドパネルの取り外し 3. HDD の取り付け 蝶ねじを取り外して、サイドパネ ステップ 1 – 3.5 インチドライブ ルを外します。 トレイにドライブを挿入します。 ステップ 1 ステップ 2 – 図に示すように、マ ザーボードの後ろから HDD ケー ジにドライブとレールアセンブリ を挿入します。 400C_400Q STEP 3 ステップ 2 2. マザーボードの取り付け 4. SSD の取り付け マザーボードの I/O シールドをホー トレイに... -
Seite 36: 電源ユニットの取り付け
CRYSTAL SERIES 460X 5. 電源ユニットの取り付け 7. 前面パネルの取り外し 電源ユニットをケースの下段チャ 前面パネルのねじを抜いて外し、し ンバーに挿入し、後ろから 4 本の っかりと持ちながらゆっくりとシャ ネジで固定します。 ーシから引き離します。 6. PCI-E/PCI カードの取り付け 8. フロント I/O コネクターの取り付け 1. 蝶ネジと対応するスロットカ フロントパネルのヘッダーの場所とピン配列は、 マザーボードのマニュアルを確認してください。 バーを取り外します。 2. 拡張カードを取り付けて、 蝶ネジで固定します。 USB 3.0 HDD LED POWER SW POWER LED – HD AUDIO RESET SW POWER LED +... -
Seite 37: Rgb ファンコントローラ (460X - Rgb) の使用
CRYSTAL SERIES 460X 9. RGB ファンコントローラ (460X - RGB) の使用 よくあるご質問 1. I/O パネルの電源とリセットヘッダーで極性は重要ですか? 詳しい説明については、付属の RGB ファンコントロ ーラクイックスタートガイドを参照してください 。 いいえ。LED のヘッダーでのみ重要です。 2. 破損したケースを受け取ったか、またはファンが動作しない場合、 誰に連絡すべきですか? 弊社の Web サイト (corsair.force.com) にアクセスし、 破損した部品の交換について RMA を依頼してください。 3. どこにファンを搭載できますか? ファンマウントの位置 前面 3x120mm, 2x140mm 上面 2x140mm/120mm 120mm 背面... - Seite 38 CRYSTAL SERIES 460X Notes Notes...