Kapitel
Inhaltsverzeichnis
Fehlerbehebung

Verwandte Anleitungen für Kenwood KMM-BT504DAB


Inhaltszusammenfassung für Kenwood KMM-BT504DAB
- Seite 1 KMM-BT504DAB DIGITAL MEDIA RECEIVER INSTRUCTION MANUAL DIGITAL-MEDIA-RECEIVER BEDIENUNGSANLEITUNG RICEVITORE MULTIMEDIALE DIGITALE ISTRUZIONI PER L’USO © 2017 JVC KENWOOD Corporation B5A-2108-00 (EN)
- Seite 2 For Israel Information on Disposal of Old Electrical and Electronic Equipment and Batteries (applicable for countries that have adopted separate waste collection systems) Products and batteries with the symbol (crossed-out wheeled bin) cannot be disposed as household waste. Old electrical and electronic equipment and batteries should be recycled at a facility capable of handling For Turkey these items and their waste byproducts.
- Seite 3 • The “AAC” logo is a trademark of Dolby Laboratories. • The Bluetooth® word mark and logos are registered trademarks owned by Bluetooth SIG, Inc. and any use of such marks by JVC KENWOOD Corporation is under license. Other trademarks and trade names are those of their respective owners.
- Seite 4 3-12, Moriya-cho, Kanagawa-ku, Yokohama-shi, Kanagawa, 221-0022, JAPAN Par la présente, JVCKENWOOD déclare que l’équipement de rádio “KMM-BT504DAB” está em conformidade com a EU Representative: radio « KMM-BT504DAB » est conforme à la directive Diretiva 2014/53/UE. JVCKENWOOD Europe B.V. 2014/53/UE. O texto integral da declaração de conformidade da UE está...
- Seite 5 радиооборудование «KMM-BT504DAB» S tem JVCKENWOOD izjavlja, da je radijska direktiiviga 2014/53/EL. Cjeloviti tekst deklaracije Europske unije o соответствует Директиве 2014/53/EU. oprema »KMM-BT504DAB« v skladu z Direktivo usklađenosti dostupan je na sljedećoj internet Полный текст декларации соответствия 2014/53/EU. ELi vastavusdeklaratsiooni terviktekst on ЕС...
-
Seite 6: Inhaltsverzeichnis
CONTENTS BEFORE USE BEFORE USE IMPORTANT • To ensure proper use, please read through this manual before using this product. It is especially important that you read and observe BASICS Warning and Caution in this manual. GETTING STARTED • Please keep the manual in a safe and accessible place for future reference. 1 Select the display language WARNING and cancel the demonstration... -
Seite 7: Basics
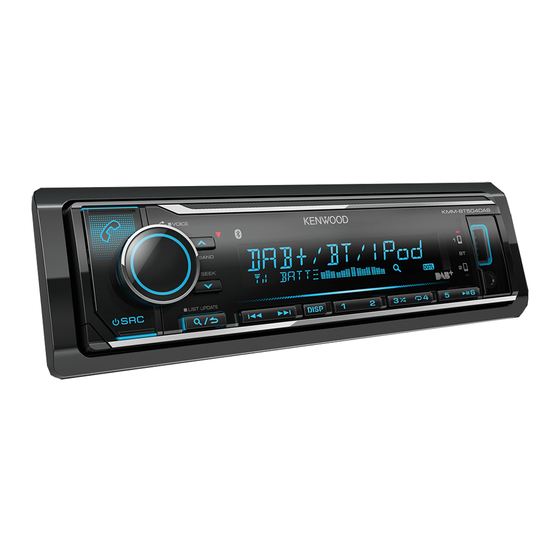
BASICS GETTING STARTED Faceplate Lights up when Bluetooth Volume Display connection is established. knob window ( 14) Select the display language and cancel the demonstration When you turn on the power for the first time (or [FACTORY RESET] is set to [YES], 5), the display shows: “SEL LANGUAGE” ... -
Seite 8: Set The Clock And Date
GETTING STARTED Default: XX Set the clock and date AUDIO CONTROL Press the volume knob to enter [FUNCTION]. SWITCH (Not applicable if 3-way crossover is selected.) Turn the volume knob to select [CLOCK], then press the knob. PREOUT REAR/SUBWOOFER: Selects whether rear speakers or a subwoofer are To adjust the clock connected to the line out terminals on the rear (through an external Turn the volume knob to select [CLOCK ADJUST], then press the knob. - Seite 9 • To cancel, press and hold F/W UP Vxxx For details on how to update the firmware, visit • To adjust the selected crossover settings, ( 22). <www.kenwood.com/cs/ce/>. FACTORY RESET YES: Resets the settings to default (except the stored station). ; Caution NO: Cancels...
-
Seite 10: Digital Radio
DIGITAL RADIO About DAB (Digital Audio Broadcasting) DAB is one of the digital radio broadcasting systems available today. It can deliver digital quality sound without any annoying interference or signal distortion. Furthermore, it can carry text, pictures and data. In contrast to FM broadcast, where each program is transmitted on its own frequency, DAB combines several programs (called “services”) to form one “ensemble.”... - Seite 11 DIGITAL RADIO Select a service by name PTY SEARCH 1 Turn the volume knob to select the available Program Type ( 8), then press the knob. Press to enter Service Search mode. 2 Turn the volume knob to select the PTY language (ENGLISH/FRENCH/ Turn the volume knob quickly to enter Alphabet Search mode.
-
Seite 12: Analog Radio
ANALOG RADIO DIGITAL RADIO CLOCK TIME SYNC ON: Synchronizes the unit’s time to the Digital Radio signal station time. ; OFF: Cancels. Available Program Type for [PTY SEARCH] SPEECH : NEWS, AFFAIRS, INFO (information), SPORT, EDUCATE, DRAMA, CULTURE, SCIENCE, VARIED, WEATHER, FINANCE, CHILDREN, SOCIAL, Search for a station RELIGION, PHONE IN, TRAVEL, LEISURE, DOCUMENT MUSIC : POP M (music), ROCK M (music), EASY M (music), LIGHT M (music),... - Seite 13 ANALOG RADIO Default: XX Available Program Type for [PTY SEARCH] TUNER SETTING SPEECH : NEWS, AFFAIRS, INFO (information), SPORT, EDUCATE, DRAMA, CULTURE, SCIENCE, VARIED, WEATHER, FINANCE, CHILDREN, SOCIAL, LOCAL SEEK ON: Searches only stations with good reception. ; OFF: Cancels. RELIGION, PHONE IN, TRAVEL, LEISURE, DOCUMENT •...
-
Seite 14: Usb/Ipod/Android
When connecting an Android device, “Press [VIEW] to install KENWOOD MUSIC PLAY APP” is shown. Follow the instructions to install the application. You can also install the latest version of KENWOOD MUSIC PLAY application on your Android device before connecting. For more information, visit <www.kenwood.com/cs/ce/>. - Seite 15 While in ANDROID source, press 5 repeatedly. Skip Search (applicable only for iPod USB and ANDROID source) BROWSE MODE : Control Android device from this unit via KENWOOD Press S / T to search at a preset skip search ratio. MUSIC PLAY application installed in the Android device.
-
Seite 16: Aux
(via USB input terminal). Start listening Preparation: Connect a portable audio player (commercially available). Install the latest version of KENWOOD Remote application on your device Auxiliary input jack before connecting. For more information, visit Portable audio player <www.kenwood.com/cs/ce/>. -
Seite 17: Spotify
Spotify Preparation: KCA-iP102 : 30-pin type, KCA-iP103 : Lightning type Install the latest version of the Spotify application on your device (iPhone/ Do not leave the cable inside the car when not using. iPod touch), then create an account and log in to Spotify. Available for premium account users only. -
Seite 18: Bluetooth
BLUETOOTH® BLUETOOTH — Connection Pair and connect a Bluetooth device for the first time Press to turn on the unit. Supported Bluetooth profiles – Hands-Free Profile (HFP) Search and select this unit model name (KMM-BT5**DAB) on the Bluetooth device. – Advanced Audio Distribution Profile (A2DP) “PAIRING” ... -
Seite 19: Receive A Call
– Bluetooth function of the connected device is turned on. – [AUTO PAIRING] is set to [ON]. ( 18) – KENWOOD MUSIC PLAY application is installed on the Android device Receive a call ( 10) and [BROWSE MODE] is selected. ( 11) When there is an incoming call: •... - Seite 20 BLUETOOTH® Default: XX On the faceplate MIC GAIN LEVEL –10 to LEVEL +10 (LEVEL –4): The sensitivity of the While talking on the first incoming call... microphone increases as the number increased. Answer another incoming Press NR LEVEL LEVEL –5 to LEVEL +5 (LEVEL 0): Adjust the noise reduction level until call and hold the current the least noise is being heard during a phone conversation.
- Seite 21 BLUETOOTH® Make a call PHONE BOOK (Applicable only if the phone supports PBAP.) 1 Turn the volume knob quickly to enter alphabet search mode (if the You can make a call from the call history, phonebook, or dialing the phonebook contains many contacts). number.
- Seite 22 BLUETOOTH® Make a call using voice recognition Other settings Press and hold to activate the voice recognition of the Press the volume knob to enter [FUNCTION]. connected phone. Turn the volume knob to select an item (see the following table), Speak the name of the contact you want to call or the voice then press the knob.
- Seite 23 BLUETOOTH® BLUETOOTH — Audio Bluetooth test mode While in BT AUDIO source, You can check the connectivity of the supported profile you can connect to five between the Bluetooth device and the unit. Bluetooth audio devices • Make sure there is no Bluetooth device paired. and switch between these Press and hold five devices.
- Seite 24 ANDROID CONNECTED: You are able to use the application using the Android Preparation: smartphone connected via Bluetooth. Install the latest version of KENWOOD Remote application on your device ANDROID NOT CONNECTED: No Android device is connected to use the before connecting. For more information, application.
-
Seite 25: Audio Settings
AUDIO SETTINGS BLUETOOTH® While listening to any source... Internet radio via Bluetooth Press the volume knob to enter [FUNCTION]. You can listen to Spotify on the iPhone/iPod/Android device Turn the volume knob to select an item (see the following table), then press via Bluetooth on this unit. - Seite 26 AUDIO SETTINGS Crossover settings SUBWOOFER SET ON: Turns on the subwoofer output. ; OFF: Cancels. FADER (Not applicable if 3-way crossover is selected.) Below are the available setting items for 2-way crossover R15 to F15 (0): Adjusts the rear and front speaker output balance. and 3-way crossover.
- Seite 27 AUDIO SETTINGS 2-way crossover setting items 3-way crossover setting items SPEAKER SIZE SPEAKER SIZE FRONT SIZE 8CM/10CM/12CM/13CM/16CM/17CM/18CM/ TWEETER SMALL/MIDDLE/LARGE 4×6/5×7/6×8/6×9/7×10 MID RANGE 8CM/10CM/12CM/13CM/16CM/17CM/18CM/4×6/5×7/6×8/6×9 TWEETER SMALL/MIDDLE/LARGE/NONE (not connected) WOOFER * 16CM/20CM/25CM/30CM/38CM OVER/NONE (not connected) REAR 8CM/10CM/12CM/13CM/16CM/17CM/18CM/4×6/5×7/6×8/6×9/ X ' OVER 7×10/NONE (not connected) TWEETER HPF FRQ 1KHZ/1.6KHZ/2.5KHZ/4KHZ/5KHZ/6.3KHZ/8KHZ/ SUBWOOFER *...
- Seite 28 AUDIO SETTINGS • Before making an adjustment for [DISTANCE] and [GAIN] of [DTA SETTINGS], select the Digital Time Alignment settings speaker you want to adjust: Digital Time Alignment sets the delay time of the speaker output to When 2-way crossover is selected: create a more suitable environment for your vehicle.
-
Seite 29: Display Settings
DISPLAY SETTINGS Zone identification for color and brightness settings Default: XX DISPLAY COLOR SELECT Select color for ALL ZONE, ZONE 1 and ZONE 2 separately. 1 Select a zone. (See the illustration on the left column.) 2 Select a color for the selected zone. INITIAL COLOR/VARIABLE SCAN/CUSTOM R/G/B/preset colors * To make your own color, select [CUSTOM R/G/B]. -
Seite 30: References
– iPhone 4S, 5, 5S, 5C, 6, 6 Plus, 6S, 6S Plus, SE, 7, 7 Plus More information • You cannot operate iPod if “KENWOOD” or “ ” is displayed on iPod. For: – Latest firmware updates and latest compatible item list •... - Seite 31 REFERENCES About Bluetooth Source name Display information • Depending on the Bluetooth version of the device, some Bluetooth devices may not be able SPOTIFY/SPOTIFY BT Context title (Date/Clock)* Song title (Artist) Song title to connect to this unit. (Album name) Song title (Date/Clock)* Playing time (Date/ •...
-
Seite 32: Troubleshooting
TROUBLESHOOTING Symptom Remedy Symptom Remedy Sound cannot be heard. • Adjust the volume to the optimum level. Correct characters are not • This unit can only display uppercase letters, numbers, • Check the cords and connections. displayed (e.g. album and a limited number of symbols. name). - Seite 33 • Delete pairing information from both the unit and the ( 26) Bluetooth device, then perform pairing again. ( 14) Cannot playback at • Make sure KENWOOD MUSIC PLAY APP is installed on the Echo or noise is heard • Adjust the microphone unit’s position. ( 14) [BROWSE MODE].
-
Seite 34: Installation/Connection
INSTALLATION/CONNECTION TROUBLESHOOTING Warning Symptom Remedy • The unit can only be used with a 12 V DC power supply, negative ground. “DEVICE FULL” The number of registered devices has reached its limit. • Disconnect the battery’s negative terminal before wiring and mounting. Retry after deleting an unnecessary device. -
Seite 35: Installing The Unit (In-Dash Mounting)
INSTALLATION/CONNECTION Part list for installation Installing the unit (in-dash mounting) (A) Faceplate (B) Trim plate Do the required wiring. ( 32) (C) Mounting sleeve (D) Wiring harness Hook on the top side Orientate the trim plate as Dashboard of illustrated before fitting. your car (E) Extraction key Bend the appropriate tabs to hold the... -
Seite 36: Wiring Connection
Yellow (A4) Purple ] : Rear speaker (right) For 3-way crossover: Tweeter (right) Purple/black [ Brown To connect the Kenwood navigation Gray ] : Front speaker (right) system, refer your navigation manual MUTE (Mute control wire) For 3-way crossover: Mid range speaker (right) - Seite 37 INSTALLATION/CONNECTION Installing the DAB antenna Determine the antenna installation position Connect the supplied DAB antenna to the DAB antenna jack. ( 32) • The direction of the film antenna (F) changes depending on whether the film antenna (F) is installed on the right side or left side.
-
Seite 38: Installation Overview
INSTALLATION/CONNECTION Clean the windscreen with the supplied Caution Installation overview cleaner (I). When installing the antenna cable inside the front The antenna should be installed on the passenger side pillar with the air bag installed for safety. • The front pillar cover is secured with a special clip which may need to be replaced when it is removed. - Seite 39 INSTALLATION/CONNECTION Rub the film antenna gently onto the Set the position of the protrusion of the Remove the film covering the earth sheet amplifier unit (G) with the K mark on the windscreen in the direction of the arrow and paste the earth sheet on the metal shown to allow it to stick firmly.
-
Seite 40: Specifications
SPECIFICATIONS DAB Frequency Range Band III 174.928 MHz — 239.200 MHz Channel Separation 90 dB Sensitivity –100 dBm MP3 Decode Compliant with MPEG-1/2 Audio Layer-3 Signal-to-Noise Ratio 90 dB WMA Decode Compliant with Windows Media Audio Antenna Connector Type AAC Decode AAC-LC “.aac”, “.m4a” files Antenna Output Voltage 14.4 V (11 V –... - Seite 41 SPECIFICATIONS Maximum Output Power 50 W × 4 Full Bandwidth Power 22 W × 4 (at less than 1 % THD) Speaker Impedance 4 Ω — 8 Ω Tone Action Band 1: 62.5 Hz ±9 dB Band 2: 100 Hz ±9 dB Band 3: 160 Hz ±9 dB Band 4: 250 Hz ±9 dB Band 5: 400 Hz ±9 dB Band 6: 630 Hz ±9 dB Band 7: 1 kHz ±9 dB Band 8:...
- Seite 42 INHALT VOR DER INBETRIEBNAHME VOR DER INBETRIEBNAHME WICHTIG • Um richtige Verwendung sicherzustellen, lesen Sie die Bedienungsanleitung vor der Verwendung des Produkts sorgfältig durch. Es ist besonders wichtig, dass Sie die als GRUNDLAGEN Warnung und Vorsicht gekennzeichneten Hinweise in dieser Anleitung lesen und beachten. •...
-
Seite 43: Grundlagen
GRUNDLAGEN ERSTE SCHRITTE Frontblende Lautstärke- Leuchtet beim Herstellen der Regler Displayfenster Bluetooth-Verbindung auf. ( 14) Wählen Sie die Anzeigesprache und brechen Sie die Demonstration ab [FACTORY RESET] Beim ersten Einschalten des Geräts (oder wenn [YES] 5 gestellt ist), erscheint Folgendes im Display: “SEL LANGUAGE” ... -
Seite 44: Stellen Sie Die Uhrzeit Und Das
ERSTE SCHRITTE Standard: Stellen Sie die Uhrzeit und das Datum ein AUDIO CONTROL [FUNCTION] Drücken Sie den Lautstärke-Regler, um auf zu schalten. SWITCH (Gilt nicht, wenn 3-Wege-Übergang gewählt ist.) [CLOCK] Drehen Sie den Lautstärke-Regler zum Wählen von , und drücken PREOUT REAR SUBWOOFER... - Seite 45 F/W UP xxxxx : Hebt auf (Aktualisierung wird nicht ausgeführt). Der gewählte Übergangstyp erscheint. F/W UP Vxxx Einzelheiten darüber, wie Sie die Firmware aktualisieren können, besuchen Sie • <www.kenwood.com/cs/ce/>. Zum Abbrechen halten Sie gedrückt. • Zum Anpassen der gewählten Übergangseinstellungen ( 22) FACTORY RESET : Setzt die Einstellungen auf Standardwerte zurück (ausgenommen gespeicherte...
-
Seite 46: Digital Radio
DIGITAL RADIO Wissenwertes über DAB (Digital Audio Broadcasting) DAB ist eines der heute verfügbaren digitalen Rundfunksendesysteme. Es kann Klang in Digitalqualität ohne störende Interferenzen oder Signalverzerrung liefern. Außerdem kann dieser Dienst Text, Bilder und Daten übermitteln. Im Gegensatz zu FM (UKW)-Sendungen, wo jedes Programm auf seiner eigenen Frequenz übertragen wird, kombiniert DAB mehrere Programme (“Dienste”... - Seite 47 DIGITAL RADIO Wählen Sie einen Dienst nach Namen PTY SEARCH ( 8) Drehen Sie den Lautstärke-Regler zum Wählen des verfügbaren Programmtyps und drücken Sie dann den Regler. Drücken Sie , um auf Dienstsuche zu schalten. ENGLISH Drehen Sie den Lautstärke-Regler zum Wählen der PTY-Sprache ( Drehen Sie den Lautstärke-Regler schnell für alphabetische Suche.
-
Seite 48: Analog Radio
ANALOG RADIO DIGITAL RADIO CLOCK TIME SYNC : Synchronisiert die Zeit des Geräts mit der Digitalradiosignal-Senderzeit. ; : Hebt auf. Verfügbarer Programmtyp für [PTY SEARCH] SPEECH NEWS AFFAIRS INFO (Information), SPORT EDUCATE DRAMA CULTURE SCIENCE VARIED WEATHER FINANCE CHILDREN SOCIAL RELIGION PHONE IN TRAVEL LEISURE DOCUMENT Suche nach einem Sender... - Seite 49 ANALOG RADIO Standard: Verfügbarer Programmtyp für [PTY SEARCH] SPEECH NEWS AFFAIRS INFO (Information), SPORT EDUCATE DRAMA CULTURE TUNER SETTING SCIENCE VARIED WEATHER FINANCE CHILDREN SOCIAL RELIGION LOCAL SEEK : Sucht nur Sender mit gutem Empfang. ; : Hebt auf. PHONE IN TRAVEL LEISURE DOCUMENT...
-
Seite 50: Usb/Ipod/Android
(im Handel erhältlich) Wenn ein Android-Gerät angeschlossen wird, wird “Press [VIEW] to install KENWOOD MUSIC PLAY APP” angezeigt. Gehen Sie zur Installation der Anwendung gemäß den Anweisungen vor. Sie können auch vor dem Verbinden die neueste Version der KENWOOD MUSIC PLAY-Anwendung auf Ihrem Android-Gerät installieren. - Seite 51 Drehen Sie den Lautstärke-Regler schnell, um die Liste schnell zu BROWSE MODE : Steuern Sie das Android-Gerät von dieser Einheit über die im Android- durchsuchen. Gerät installierte Anwendung KENWOOD MUSIC PLAY. HAND MODE : Steuern Sie das Android-Gerät vom Android-Gerät selber über andere Suchlauf überspringen (gilt nur für iPod USB und ANDROID-Quelle)
-
Seite 52: Aux
Vorbereitung: Auxiliary-Eingabebuchse Installieren Sie vor dem Verbinden die neueste Version der Tragbarer Audioplayer KENWOOD Remote-Anwendung auf Ihrem Gerät. Für die neueste Information besuchen Sie <www.kenwood.com/cs/ce/>. Sie können die Einstellungen auch auf gleiche Weise vornehmen wie bei Verbindung über Bluetooth. ( 20) 3,5-mm-Stereo-Ministecker mit “L”-förmigem Anschluss... -
Seite 53: Spotify
Spotify Vorbereitung: KCA-iP102 : 30-poliger Typ, KCA-iP103 : Lightning-Typ Installieren Sie die neueste Version der Spotify-Anwendung auf Ihrem Gerät (iPhone/ Lassen Sie bei Nichtgebrauch nicht das Kabel im Auto liegen. iPod touch), erstellen Sie ein Konto und melden sich bei Spotify an. Nur für Premium-Konto-Anwender verfügbar. -
Seite 54: Bluetooth
BLUETOOTH® BLUETOOTH — Verbindung Zum erstmaligen Registrieren und Anschließen eines Bluetooth-Geräts Unterstützte Bluetooth-Profile Drücken Sie , um die Einheit einzuschalten. – Hands-Free Profile (HFP) Suchen und wählen Sie den Modellnamen dieser Einheit (KMM-BT5 DAB) auf dem – Advanced Audio Distribution Profile (A2DP) Bluetooth-Gerät. -
Seite 55: Empfangen Sie Einen Ruf
– Die Bluetooth-Funktion des angeschlossenen Geräts eingeschaltet ist. – [AUTO PAIRING] [ON] gestellt ist. ( 18) – Die KENWOOD MUSIC PLAY-Anwendung wird auf dem Android-Gerät ( 10) [BROWSE MODE] ( 11) installiert, und wird gewählt. Empfangen Sie einen Ruf Wenn ein Ruf empfangen wird: •... - Seite 56 BLUETOOTH® Standard: Auf der Frontblende MIC GAIN LEVEL –10 LEVEL +10 LEVEL –4 bis ( ): Die Empfindlichkeit des Mikrofons nimmt Während des Sprechens beim ersten ankommenden Anruf... mit höherer Zahl zu. Einen anderen Drücken Sie NR LEVEL LEVEL –5 LEVEL +5 LEVEL 0 bis ( ): Passen Sie den Rauschunterdrückungspegel ankommenden Anruf an, bis das geringste Rauschen bei einem Telefongespräch gehört wird.
- Seite 57 BLUETOOTH® Tätigen Sie einen Ruf PHONE BOOK (Nur gültig, wenn das Telefon PBAP unterstützt.) Drehen Sie den Lautstärke-Regler schnell, um auf alphabetische Suche zu schalten Sie können einen Ruf von der Ruf-Historie, dem Telefonbuch oder durch Wählen der (wenn das Telefonbuch viele Kontakte enthält). Telefonnummer tätigen.
- Seite 58 BLUETOOTH® Einen Ruf mit Spracherkennung tätigen Andere Einstellungen Halten Sie gedrückt, um die Spracherkennung auf dem Drücken Sie den Lautstärke-Regler, um auf [FUNCTION] zu schalten. angeschlossenen Telefon zu aktivieren. Drehen Sie den Lautstärke-Regler, um einen Gegenstand zu treffen Sprechen Sie den Namen des anzurufenden Kontakts oder den (siehe folgende Tabelle), und drücken Sie dann den Regler.
-
Seite 59: Audioplayer Über Bluetooth
BLUETOOTH® BLUETOOTH — Audio Bluetooth-Testmodus Während BT AUDIO als Quelle Sie können die Konnektivität des unterstützten Profils zwischen dem eingestellt ist, können Sie die Bluetooth-Gerät und der Einheit prüfen. Verbindung zu fünf Bluetooth- • Stellen Sie sicher, dass kein Bluetooth-Gerät gekoppelt ist. Audiogeräten herstellen und Halten Sie gedrückt. - Seite 60 : Kein Android-Gerät ist zur Verwendung der Anwendung Vorbereitung: angeschlossen. Installieren Sie vor dem Verbinden die neueste Version der KENWOOD Remote-Anwendung auf Ihrem Gerät. Für die neueste Information besuchen Sie <www.kenwood.com/cs/ce/>. Hören von iPhone/iPod über Bluetooth Drücken Sie den Lautstärke-Regler, um auf [FUNCTION] zu schalten.
-
Seite 61: Audioeinstellungen
AUDIOEINSTELLUNGEN BLUETOOTH® Während des Hörens einer Tonquelle... Internetradio über Bluetooth [FUNCTION] Drücken Sie den Lautstärke-Regler, um auf zu schalten. Sie können Spotify auf dem iPhone/iPod/Android-Gerät über Bluetooth Drehen Sie den Lautstärke-Regler, um einen Gegenstand zu treffen (siehe folgende auf dieser Einheit hören. Tabelle), und drücken Sie dann den Regler. - Seite 62 AUDIOEINSTELLUNGEN Übergangseinstellungen SUBWOOFER SET : Schaltet den Subwoofer-Ausgang ein. ; : Hebt auf. FADER (Gilt nicht, wenn 3-Wege-Übergang gewählt ist.) Im Folgenden werden die verfügbaren Einstellpunkte für 2-Wege- ): Stellt die Balance zwischen hinterem und vorderem Lautsprecherausgang ein. Übergang und 3-Wege-Übergang gezeigt. BALANCE ): Stellen Sie die Ausgangsbalance zwischen linken und rechten Lautsprechern ein. SPEAKER SIZE Wählt entsprechend der Größe der angeschlossenen Lautsprecher VOLUME OFFSET...
- Seite 63 AUDIOEINSTELLUNGEN Einstellpunkte für 2-Wege-Übergang Einstellpunkte für 3-Wege-Übergang SPEAKER SIZE SPEAKER SIZE FRONT SIZE 10CM 12CM 13CM 16CM 17CM 18CM TWEETER SMALL MIDDLE LARGE 4×6 5×7 6×8 6×9 7×10 MID RANGE 10CM 12CM 13CM 16CM 17CM 18CM 4×6 5×7 6×8 6×9 TWEETER SMALL MIDDLE...
- Seite 64 AUDIOEINSTELLUNGEN • [DISTANCE] [GAIN] [DTA SETTINGS] Bevor Sie eine Einstellung für vornehmen, wählen Sie den Einstellungen der digitalen Zeitanpassung anzupassen gewünschten Lautsprecher aus: Wenn 2-Wege-Übergang gewählt ist: Die digitale Zeitanpassung stellt die Verzögerungszeit des Lautsprecherausgangs ein, FRONT LEFT FRONT RIGHT REAR LEFT REAR RIGHT SUBWOOFER...
-
Seite 65: Display-Einstellungen
DISPLAY-EINSTELLUNGEN Zonen-Identifikation für Farb- und Helligkeitseinstellungen Standard: DISPLAY COLOR SELECT ALL ZONE ZONE 1 ZONE 2 Wählen Sie die Farbe für getrennt. Wählen Sie eine Zone. (Siehe Abbildung in der linken Spalte.) Wählen Sie eine Farbe für die gewählte Zone. INITIAL COLOR VARIABLE SCAN CUSTOM R/G/B... -
Seite 66: Zur Bezugnahme
– iPhone 4S, 5, 5S, 5C, 6, 6 Plus, 6S, 6S Plus, SE, 7, 7 Plus Frontblende) • Sie können den iPod nicht bedienen, wenn “KENWOOD” oder “ ” auf dem iPod angezeigt wird. Weitere Informationen • Je nach der Version des Betriebssystems des iPod/iPhone sind einige Funktionen möglicherweise nicht verfügbar. -
Seite 67: Quellenname
ZUR BEZUGNAHME Wissenwertes über Bluetooth Quellenname Display-Information • Je nach Bluetooth-Version des Geräts lassen sich manche Bluetooth-Geräte möglicherweise nicht an diese Einheit anschließen. SPOTIFY/SPOTIFY BT Kontexttitel (Datum/Uhrzeit)* Songtitel (Interpret) Songtitel (Albumname) • Diese Einheit arbeitet u.U. nicht mit bestimmten Bluetooth-Geräten. Songtitel (Datum/Uhrzeit)* Spielzeit (Datum/Uhrzeit)* (zurück zum... -
Seite 68: Fehlersuche
FEHLERSUCHE Symptom Abhilfe Symptom Abhilfe Es wird kein Ton gehört. • Richtige Zeichen werden nicht • Die Lautstärke auf den optimalen Pegel einstellen. Dieses Gerät kann nur Großbuchstaben, Zahlen und eine begrenzte • angezeigt (z.B. Albumname). Prüfen Sie die Kabel und Verbindungen. Anzahl von Symbolen anzeigen. - Seite 69 Android-Gerät nicht das Audiosignal zur Einheit leiten. ( 14) Bluetooth-Gerät, und führen Sie dann das Pairing erneut aus. • [BROWSE MODE] Stellen Sie sicher, dass KENWOOD MUSIC PLAY APP im Android-Gerät Echo oder Rauschen • ( 14) Justieren Sie die Mikrofoneinheit-Position.
-
Seite 70: Einbau/Anschluss
EINBAU/ANSCHLUSS FEHLERSUCHE Warnung Symptom Abhilfe • Das Gerät kann nur bei 12 V DC-Versorgung mit negativer Masse eingebaut werden. “DEVICE FULL” Die Anzahl registrierter Geräte hat den Höchstwert erreicht. Löschen • Trennen Sie den negativen Batterieanschluss vor der Verkabelung und Befestigung ab. Sie unbenötigte Geräte und wiederholen Sie den Vorgang. -
Seite 71: Einbau Der Einheit (Einbau Im Armaturenbrett)
EINBAU/ANSCHLUSS Teileliste für den Einbau Einbau der Einheit (Einbau im Armaturenbrett) Frontblende Frontrahmen Führen Sie die erforderliche ( 32) Verkabelung aus. Einbauhalterung Kabelbaum Haken auf der Oberseite Richten Sie den Frontrahmen vor Armaturenbrett dem Anbringen aus, wie in der Ihres Autos Abbildung gezeigt. - Seite 72 Gelb (A4) Lila Hinterer Lautsprecher (rechts) Für 3-Wege-Übergang: Hochtöner (rechts) Lila/Schwarz Beziehen Sie sich hinsichtlich des Anschlusses Braun Grau an das Kenwood-Navigationssystem auf die Vorderer Lautsprecher (rechts) (Stummschaltungs- MUTE Bedienungsanleitung des betreffenden Geräts Für 3-Wege-Übergang: Mitteltöner (rechts) Grau/Schwarz Steuerkabel) Weiß...
-
Seite 73: Installieren Sie Die Dab-Antenne
EINBAU/ANSCHLUSS Installieren Sie die DAB-Antenne Bestimmen Sie die Antenneneinbauposition ( 32) Schließen Sie die mitgelieferte DAB-Antenne an die DAB-Antennenbuchse an. • Die Richtung der Folienantenne ist unterschiedlich, je nachdem ob die Folienantenne an der rechten oder linken Seite installiert ist. •... -
Seite 74: Einbauübersicht
EINBAU/ANSCHLUSS Reinigen Sie die Windschutzscheibe mit dem Vorsicht Einbauübersicht mitgelieferten Reiniger Beim Installieren des Antennenkabels im Inneren Die Antenne sollte aus Sicherheitsgründen auf der Beifahrerseite der Frontsäule bei eingebautem Airbag installiert werden. • Die Frontsäulenabdeckung wird mit einem speziellen Clip gesichert, der beim Ausbau möglicherweise ausgetauscht werden muss. - Seite 75 EINBAU/ANSCHLUSS Reiben Sie die Folienantenne vorsichtig auf Richten Sie die Position des Vorsprungs Entfernen Sie die Folie, die das Erdungsblatt der Windschutzscheibe in Pfeilrichtung, um an der Verstärkereinheit mit der abdeckt, und kleben Sie das Erdungsblatt auf sicheres Anhaften zu erzielen. -Markierung an der Folienantenne den Metallteil des Fahrzeugs.
-
Seite 76: Technische Daten
TECHNISCHE DATEN Frequenzbereich Band III 174,928 MHz — 239,200 MHz Kanaltrennung 90 dB Empfindlichkeit –100 dBm MP3-Decodierung Unterstützt MPEG-1/2 Audio Layer-3 Signal-Rauschabstand 90 dB WMA-Decodierung Unterstützt Windows Media Audio Antennenanschluss-Typ AAC-Decodierung AAC-LC “.aac”, “.m4a”-Dateien Antennen-Ausgangsspannung 14,4 V (11 V – 16 V) WAV-Decodierung Linear PCM Antennen-Maximalstrom < 100 mA FLAC-Decodierung FLAC-Datei (Bis zu 96 kHz/24 Bit) Frequenzbereich 87,5 MHz —... - Seite 77 TECHNISCHE DATEN Maximale Ausgangsleistung 50 W × 4 Volle Bandbreitenleistung 22 W × 4 (bei weniger als 1 % Klirrfaktor) Lautsprecherimpedanz 4 Ω — 8 Ω Klangregler Band 1: 62,5 Hz ±9 dB Band 2: 100 Hz ±9 dB Band 3: 160 Hz ±9 dB Band 4: 250 Hz ±9 dB Band 5: 400 Hz ±9 dB Band 6: 630 Hz ±9 dB...
-
Seite 78: [Function] ( 5)
INDICE PRIMA DELL’USO PRIMA DELL’USO IMPORTANTE • Prima di usare l’apparecchio, e per usarlo in modo corretto, si raccomanda di leggere a fondo questo manuale. È particolarmente importante leggerne e osservarne gli avvisi e FONDAMENTI le note di attenzione. • È... -
Seite 79: Fondamenti
FONDAMENTI OPERAZIONI PRELIMINARI Frontalino S’illumina non appena si stabilisce la connessione Manopola del Finestra del Bluetooth. ( 14) volume display Selezionare la lingua da usare per le visualizzazioni e annullare il modo dimostrativo [FACTORY Alla prima accensione dell’unità (o quando s’imposta RESET] [YES] 5... -
Seite 80: Impostare L'ora E La Data
OPERAZIONI PRELIMINARI Impostazione predefinita: Impostare l’ora e la data AUDIO CONTROL [FUNCTION] Premere la manopola del volume per accedere al modo SWITCH (Non selezionabile quando è selezionato il crossover a tre vie.) [CLOCK] Ruotare la manopola del volume sino a selezionare e quindi PREOUT REAR... - Seite 81 ( 22) Per regolare le impostazioni di crossover, F/W UP Vxxx Per informazioni particolareggiate sull’aggiornamento del firmware si prega di vedere il sito <www.kenwood.com/cs/ce/>. Attenzione Si deve selezionare il tipo di crossover adatto alla modo di collegamento dei diffusori. FACTORY RESET : ripristina le impostazioni di fabbrica (a eccezione di quelle salvate dall’utilizzatore). ;...
-
Seite 82: Radio Digitale
RADIO DIGITALE Informazioni sulla funzione DAB (Digital Audio Broadcasting) Il DAB è uno dei sistemi di diffusione radio digitale oggi disponibili. Esso offre un suono di qualità digitale esente da interferenze o distorsioni del segnale. Può inoltre trasmettere testi, immagini e dati. A differenza della diffusioni FM, ove ciascun programma è... - Seite 83 RADIO DIGITALE Per selezionare un servizio per nome PTY SEARCH Ruotare la manopola del volume sino a selezionare il tipo di programma disponibile ( 8) e quindi premerla. Premere per accedere al modo di ricerca dei servizi. ENGLISH Ruotare la manopola del volume sino a selezionare la lingua PTY ( Ruotare velocemente la manopola del volume per accedere al modo di FRENCH GERMAN...
-
Seite 84: Radio Analogica
RADIO ANALOGICA RADIO DIGITALE CLOCK TIME SYNC : sincronizza l’ o ra dell’apparecchio con il segnale orario della stazione DAB. ; : annulla. Tipi di programma disponibili durante la ricerca [PTY SEARCH] SPEECH NEWS AFFAIRS INFO (informazioni), SPORT EDUCATE DRAMA CULTURE SCIENCE VARIED WEATHER FINANCE CHILDREN SOCIAL... - Seite 85 RADIO ANALOGICA Impostazione predefinita: Tipi di programma disponibili durante la ricerca [PTY SEARCH] SPEECH NEWS AFFAIRS INFO (informazioni), SPORT EDUCATE DRAMA CULTURE TUNER SETTING SCIENCE VARIED WEATHER FINANCE CHILDREN SOCIAL RELIGION LOCAL SEEK : cerca soltanto le stazioni dal segnale forte. ; : annulla.
-
Seite 86: Usb, Ipod E Android
Quando è collegata una periferica Android: appare “Press [VIEW] to install KENWOOD MUSIC PLAY APP”. Seguire le istruzioni per installare l’applicazione. La più recente versione dell’applicazione KENWOOD MUSIC PLAY può essere altresì installata nella periferica Android prima di collegarla. Per maggiori informazioni al riguardo si prega di visitare il sito <www.kenwood.com/cs/ce/>. - Seite 87 : controlla il dispositivo Android dall’unità principale per mezzo Premere / per cercare i file al rapporto di salto ricerca pre- dell’applicazione KENWOOD MUSIC PLAY in esso installata. impostato. ( 12, [SKIP SEARCH]) HAND MODE : controlla il dispositivo Android da esso stesso per mezzo di un’altra •...
-
Seite 88: Aux
[SOURCE SELECT] impostare [BUILT-IN AUX] [ON] ( 4) L’applicazione KENWOOD Remote permette di gestire il sintolettore KENWOOD con un iPhone o un iPod (mediante la presa d’ingresso USB). Avviare l’ascolto Preparazione: Collegare un comune lettore audio portatile (del tipo comunemente Prima di connettere il dispositivo è... -
Seite 89: Spotify
Spotify Preparazione: KCA-iP102 : tipo a 30 contatti; KCA-iP103 : tipo Lightning Installare nel proprio iPhone o iPod touch l’ultima versione di Spotify, creare un account Quando non lo si usa, non lasciare il cavo nella vettura. e accedere al sito Spotify. Disponibile soltanto con gli account premium. -
Seite 90: Bluetooth
BLUETOOTH® BLUETOOTH — Connessione Accoppiamento e connessione iniziale di un dispositivo Bluetooth Profili BLUETOOTH compatibili Premere per accendere l’apparecchio. – HFP (chiamate vivavoce) Dalla periferica Bluetooth ricercare e selezionare l’apparecchio modello (KMM-BT5 DAB). – A2DP (distribuzione audio avanzata) Sul display appare “PAIRING” “PASS XXXXXX” Nome della periferica “PRESS” “VOLUME KNOB”. –... -
Seite 91: Accoppiamento Automatico
– La funzione [AUTO PAIRING] è impostata su [ON] ( 18) – ( 10) Nel dispositivo Android è installata l’applicazione KENWOOD MUSIC PLAY ed è Ricevere una chiamata [BROWSE MODE] ( 11) selezionato Al sopraggiungere di una chiamata: • ZONE 2 inizia a lampeggiare di colore verde. - Seite 92 BLUETOOTH® Impostazione predefinita: Dal frontalino MIC GAIN LEVEL –10 LEVEL +10 LEVEL –4 a ( ): la sensibilità del microfono incorporato Mentre si risponde alla prima chiamata... aumenta all’aumentare del numero selezionato. Rispondere a un’altra Premere NR LEVEL LEVEL –5 LEVEL +5 LEVEL 0 a ( ): regola il livello di riduzione dell’ e co sino a ridurre chiamata lasciando in al minimo il rumore durante la conversazione telefonica.
- Seite 93 BLUETOOTH® Come effettuare una chiamata PHONE BOOK (Selezionabile soltanto quando il telefono connesso è compatibile con il profilo PBAP.) Ruotare velocemente la manopola del volume per accedere al modo di ricerca alfabetico Le chiamate possono essere effettuate dalla cronologia delle chiamate, dalla rubrica (quando la rubrica telefonica contiene molti contatti).
- Seite 94 BLUETOOTH® Come effettuare una chiamata mediante riconoscimento Altre impostazioni vocale Premere la manopola del volume per accedere al modo [FUNCTION] Premere a lungo per attivare la funzione di riconoscimento vocale Ruotare la manopola del volume sino a selezionare l’elemento del telefono connesso. desiderato (vedere la tabella che segue), e quindi premerla.
- Seite 95 BLUETOOTH® BLUETOOTH — Audio Modo di prova Bluetooth Mentre ci si trova nella L’apparecchio può verificare l’effettiva capacità di connessione dei sorgente BT AUDIO è possibile propri profili con le periferiche Bluetooth. connettere e commutare • Accertarsi che non vi sia alcuna periferica Bluetooth accoppiata. a piacere sino a cinque Premere a lungo periferiche audio Bluetooth.
- Seite 96 IOS CONNECTED : permette di usare l’applicazione con l’iPhone o l’iPod mediante la connessione L’applicazione KENWOOD Remote permette di gestire il sintolettore KENWOOD con un Bluetooth o la presa d’ingresso USB. iPhone o un iPod (mediante la connessione Bluetooth o la presa d’ingresso USB) o con IOS NOT CONNECTED : non è...
-
Seite 97: Impostazioni Audio
IMPOSTAZIONI AUDIO BLUETOOTH® Durante l’ascolto di una sorgente qualsiasi... Radio Internet attraverso la connessione Bluetooth [FUNCTION] Premere la manopola del volume per accedere al modo Questo apparecchio permette di ascoltare Spotify con un iPhone, un iPod Ruotare la manopola del volume sino a selezionare l’elemento desiderato (vedere la o un dispositivo Android mediante la connessione Bluetooth. - Seite 98 IMPOSTAZIONI AUDIO Impostazione del crossover SUBWOOFER SET : attiva l’uscita al subwoofer. ; : annulla. FADER (Non selezionabile quando è selezionato il crossover a tre vie.) Di seguito si riportano i parametri d’impostazione dei crossover a ): regola il bilanciamento delle uscite dei diffusori posteriore e anteriori. due e a tre vie.
- Seite 99 IMPOSTAZIONI AUDIO Parametri d’impostazione del crossover a due vie Parametri d’impostazione del crossover a tre vie SPEAKER SIZE SPEAKER SIZE FRONT SIZE 10CM 12CM 13CM 16CM 17CM 18CM TWEETER SMALL MIDDLE LARGE 4×6 5×7 6×8 6×9 7×10 MID RANGE 10CM 12CM 13CM 16CM...
- Seite 100 IMPOSTAZIONI AUDIO • [DISTANCE] [GAIN] [DTA SETTINGS] Prima d’impostare i parametri è necessario selezionare il Allineamento temporale digitale diffusore da regolare: Quando si seleziona il crossover a due vie: La funzione Allineamento temporale digitale imposta il ritardo temporale dell’uscita dei FRONT LEFT FRONT RIGHT REAR LEFT...
-
Seite 101: Impostazioni Di Visualizzazione
IMPOSTAZIONI DI VISUALIZZAZIONE Identificazione delle zone per l’impostazione dei colori e della luminosità Impostazione predefinita: DISPLAY COLOR SELECT ALL ZONE ZONE 1 ZONE 2 Seleziona il colore per in modo indipendente. Selezionare una zona. (Vedere l’illustrazione a sinistra.) Scegliere il colore desiderato per la zona selezionata. INITIAL COLOR VARIABLE SCAN CUSTOM R/G/B... -
Seite 102: Riferimenti
– iPhone 4S, 5, 5S, 5C, 6, 6 Plus, 6S, 6S Plus, SE, 7, 7 Plus del frontalino) • L’iPod non è utilizzabile quando sul suo display appare “KENWOOD” o “ ”. Informazioni aggiuntive • Dipendentemente dalla versione del sistema operativo dell’iPod o dell’iPhone, con questa unità alcune funzioni Per: –... -
Seite 103: Cambiare Le Informazioni Visualizzate Sul Display
RIFERIMENTI Note sulla funzione Bluetooth Nome della sorgente Informazioni visualizzate • Dipendentemente dalla loro versione Bluetooth alcune periferiche potrebbero non riuscire a connettersi con questo apparecchio. SPOTIFY/SPOTIFY BT Titolo contesto (data/orologio)* Titolo del brano (artista) Titolo del brano • L’apparecchio potrebbe non operare con alcune periferiche Bluetooth. (nome dell’album) Titolo del brano (data/orologio)* Durata di riproduzione... -
Seite 104: Risoluzione Dei Problemi
RISOLUZIONE DEI PROBLEMI Problema Rimedi Problema Rimedi Il suono non è udibile. • Non vengono visualizzati i • Regolare il volume al livello ottimale. Questa unità può visualizzare soltanto lettere maiuscole, numeri e un • caratteri corretti (ad esempio, il Controllare i cavi e i collegamenti. - Seite 105 Bluetooth ed eseguirlo nuovamente. [BROWSE • La riproduzione Accertarsi che nella periferica Android sia installata l’applicazione MODE] non riesce. KENWOOD MUSIC PLAY APP. ( 10) La conversazione telefonica è • ( 14) Regolare la posizione del microfono dell’apparecchio. •...
-
Seite 106: Installazione Ecollegamenti
INSTALLAZIONE E COLLEGAMENTI RISOLUZIONE DEI PROBLEMI Avviso Problema Rimedi • Questo apparecchio è installabile esclusivamente nei veicoli provvisti di alimentazione da 12 V CC con messa a terra “DEVICE FULL” Il numero di periferiche registrate ha raggiunto il limite permesso. sul negativo. -
Seite 107: Procedura Di Base
INSTALLAZIONE E COLLEGAMENTI Elenco delle parti per l’installazione Installazione dell’apparecchio (nel cruscotto) Frontalino Mascherina Eseguire i collegamenti elettrici ( 32) previsti. Supporto di montaggio Fascio dei cavi Agganciare alla parte alta Prima di applicare la mascherina Cruscotto del veicolo orientarla nel modo qui illustrato. Chiavetta di estrazione Piegare le linguette interessate in modo da bloccare bene in posizione il supporto di montaggio. -
Seite 108: Collegamento Dei Cavi
Con il crossover a tre vie: tweeter (destra) Porpora/nero Per informazioni sul collegamento del sistema Marrone Grigio Diffusore anteriore (destro) di navigazione Kenwood si prega di consultarne (Cavo esclusione audio) MUTE Con il crossover a tre vie: diffusore dei medi (destra) il manuale Grigio/nero... -
Seite 109: Installazione Dell'antenna Dab
INSTALLAZIONE E COLLEGAMENTI Installazione dell’antenna DAB Stabilire il punto di fissaggio dell’antenna ( 32) Collegare l’antenna DAB, fornita in dotazione, all’apposita presa d’ingresso DAB. • La direzione dell’antenna a pellicola varia a seconda che la s’installi sul lato destro o sinistro del veicolo. •... -
Seite 110: Panoramica Dell'installazione
INSTALLAZIONE E COLLEGAMENTI Pulire il parabrezza con la salviettina Attenzione Panoramica dell’installazione fornita in dotazione. Passaggio del cavo d’antenna nel montante del Per ragioni di sicurezza l’antenna dovrebbe essere installata sul lato del veicolo quando vi è installato l’airbag passeggero. •... - Seite 111 INSTALLAZIONE E COLLEGAMENTI Strofinandola premere delicatamente Allineare la sporgenza dell’amplificatore Rimuovere la pellicola protettiva dalla l’antenna contro il parabrezza nel senso al contrassegno ubicato sull’antenna lamina di collegamento a massa e applicare della freccia in modo che vi aderisca farlo aderire al vetro. quest’ultima alla parte metallica del veicolo.
-
Seite 112: Caratteristiche Tecniche
CARATTERISTICHE TECNICHE Gamma di frequenza Banda III 174,928 MHz — 239,200 MHz Separazione tra i canali 90 dB Sensibilità –100 dBm Decodifica MP3 Conforme a MPEG-1/2 Audio Layer-3 Rapporto segnale/rumore 90 dB Decodifica WMA Conforme a Windows Media Audio Tipo di connettore d’antenna Decodifica AAC File AAC-LC “.aac”... - Seite 113 CARATTERISTICHE TECNICHE Potenza di uscita massima 50 W × 4 Potenza alla massima larghezza di banda 22 W × 4 (con distorsione armonica totale inferiore all’1%) Impedenza altoparlanti 4 Ω — 8 Ω Controlli di tono Banda 1: 62,5 Hz ±9 dB Banda 2: 100 Hz ±9 dB Banda 3: 160 Hz ±9 dB Banda 4:...