Blaupunkt CASUAL 845 Bedienungsanleitung
Vorschau ausblenden
Andere Handbücher für CASUAL 845:
- Bedienungsanleitung (26 Seiten) ,
- Bedienungsanleitung (72 Seiten)
Inhaltsverzeichnis
Werbung
Verfügbare Sprachen
Verfügbare Sprachen
Werbung
Kapitel
Inhaltsverzeichnis

Verwandte Anleitungen für Blaupunkt CASUAL 845


Inhaltszusammenfassung für Blaupunkt CASUAL 845
-
Seite 3: Achtung Netzstecker Ziehen
Deutsch ACHTUNG NETZSTECKER ZIEHEN BEIM VERLASSEN DER MASCHINE, BEI WARTUNGSARBEITEN ODER BEIM WECHSELN VON MECHANISCHEN TEILEN ODER ZUBEHÖRTEILEN Deutsch WICHTIGE SICHERHEITSANWEISUNGEN Bei der Verwendung eines elektrischen Gerätes sollen immer für die Sicherheit grundsätzliche Vorsichtsmaßnahmen getroffen werden, einschließlich: Lesen Sie vor der Verwendung (dieses Gerätes) alle Gebrauchshinweise. GEFAHRENHINWEIS -- zur Verminderung des Risikos eines elektrischen Schlages: Ein Apparat, der an das elektrische Netz durch den Stecker angeschlossen ist, sollte nie unbeobachtet bleiben. -
Seite 4: Warnhinweise
Deutsch WARNHINWEISE Halten Sie Ihre Finger weg von allen sich bewegenden Teilen. Besondere Vorsicht ist rund um die Nadel der Nähmaschine geboten. Verwenden Sie die Original Stichplatte. Verwenden Sie keine verbogene bzw. stumpfe Nadel. Der Stoff soll während des Nähens weder gezogen noch geschoben werden. Falsches Bedienen kann zu Nadelbruch führen. Schalten Sie die Nähmaschine immer aus ("O"), wenn Sie die Nadel oder den Nähfuß... -
Seite 5: Inhaltsverzeichnis
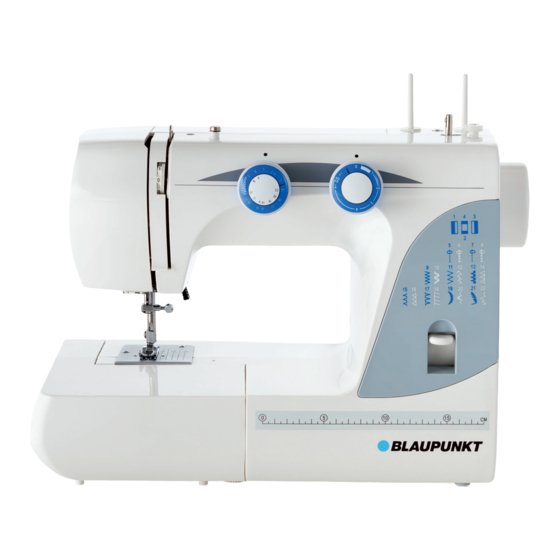
INHALTSVERZEICHNIS Teil 1 Einstellen von Stretch Stichen…...…. Annähen von Knöpfen………………. Hauptteile der Maschine…………. "Rückwärts" Zurück Nähen…………. Knopfloch……………………………... Nählineal……………………………… Teil2 Stopfplatte…………………………….. Teil 5 Nähvorbereitung…………………... Linke Nadelposition………………….. Muschelsaum………………………… Fußanlasser………………………... Overlockstich…………………………. Nählicht ……………………………... Teil 3 Stichprogramm……………………….. Geradstich…………………………….. Oberfadenspannung…………………. Anschiebetisch…………………….. Nährichtung ändern………………….. Nähfußbefestigung……………….. Zick-Zack-Stich………………………. Teil 6 Reinigen der Maschine………………... - Seite 6 HAUPTTEILE Garnrollenhalter Fadenführung zum Spulen Spulen Überlaufstopper Fadenführung Spulspindel Stichlängenwahlknopf Fadengeber Fadengeber Rücklauftaste Kopfdeckel Nadelplatte Armabdeckung Handrad Füßchenheber Stichwahlknopf Ausloserad Oberfadenspannung Freiarm Greiferabdeckung Nadel- Befestigungsschraube An/Aus-Schalter Anschiebetisch Stecker Abdeckung Abdeckung...
-
Seite 7: Teil2 Nähvorbereitung
NÄHVORBEREITUNG AUSWECHSELN DER GLÜHLAMPE ANSCHLUSS DES FUßANLASSERS DER FUßANLASSER ANSCHLUSS DES FUSSANLASSERS Nur bei Ausführung mit Glühlampe ACHTUNG NETZSTECKER Mittels des Fußanlassers ZIEHEN! (Pedal) wird die Nähgeschwindigkeit reguliert. Verbinden Sie Fußanlasser und Kabel wie abgebildet. (Nur für Ausführung mit E14 Lege n Sie das Pedal so auf den Bevor Sie die Maschine anschließen, beachten Sie bitte, dass die Glühlampe) -
Seite 8: Anschiebetisch
Der Anschiebetisch (Zubehörbox) Für einfache Näharbeiten sollte der Anschiebetisch verwendet werden. ENTFERNEN DES ANSCHIEBETISCHES Dadurch wird die Arbeitsfläche vergrößert und somit das Nähen erleichtert. Ziehen Sie den Anschiebetisch in Pfeilrichtung nach vorne weg und Sie können nun den Freiarm benutzen. Schwer zugängliche Stellen wie Manschetten, Ärmel, Hosenbeine usw. -
Seite 9: Auswechseln Der Nadel
Auswechseln der Nadel Lösen Sie die Nadelbefestigungs- Verwenden Sie stets gerade Nadeln schraube und nehmen Sie die Nadel mit einer einwandfreien Spitze. heraus. Verbogene oder stumpfe Nadeln verursachen, Fehlstiche, Nadelbruch Einsetzen der neuen Nadel: und können auch Greifer und Die flache Seite des Nadelkolbens Stichplatte beschädigen. -
Seite 10: Einstellen Garnrollenstift
Einfädeln des Oberfadens Einstellen Garnrollenstift Herausnehmen und Einsetzen der Spulenkapsel Herausnehmen und Einsetzen der Spulenkapsel Arbeit aus! Einstellen Garnrollenstift Schalten Sie die Maschine während dieser Schalten Sie die Maschine während dieser Einsetzen der Spulenkapsel Einsetzen der Spulenkapsel Ziehen Sie den Garnrollenstift. Beim Einsetzen der Spulenkapsel ca. -
Seite 11: Einsetzen Der Spule
Einsetzen der Spule Setzen Sie die Spule in die Setzen Sie die Spule in die Faden in den Schlitz der Faden nach links, unter die Faden nach links, unter die Spulenkapsel wie abgebildet abgebildet . Spulenkapsel gleiten lassen. Spannungsfeder hindurch bis zur Spannungsfeder hindurch bis zur Faden in Pfeilrichtung. -
Seite 12: Einfädeln Des Unterfadens
Einfädeln des Unterfadens Beide Fäden bis etwa 15cm herausziehen Fadenende des Oberfadens mit der linken Drehen Sie nun das Handrad langsam in und nach links unter den Nähfuß legen. Hand wie auf der Abbildung halten. Ihre Richtung, bis der Gelenkfadenhebel sich wieder in der höchsten Stellung befindet. -
Seite 13: Stichprogramm
Stichprogramm Musterwählknopf (Programm-Selector) Dieser Knopf wird entsprechend dem gewünschten Muster gedreht, Einstellmarke entweder nach links oder nach rechts. * Bitte beachten Sie, dass beim Drehen des Musterknopfes die 15 17 19 21 Nadel immer in höchster Position steht. 16 18 20 22 Musterwahlknopf Stichlängenregulierung... -
Seite 14: Einstellung Der Stretchstiche
Einstellung der Stretchstiche Einstellung der Stretchstiche Um die Stretchstiche einzustellen, drehen Sie den Einstellmarkierung MITTE Stichlängeneinstellknopf in den Bereich – SS +. + .SS. - Die Stretchstiche befinden sich im inneren Kreis des Stichmusterwählers, diese sollten in der Mitte des + SS - Bereiches eingestellt werden. -
Seite 15: Geradstich
Geradstich Maschineneinstellung Stichwahlknopf Stich (5) Fadenspannung Stichlänge 1.5 ~ 4 1.5 - 4 Legen Sie das Nähgut so unter den Nähen Sie bis zur Stoffkante um die Schneiden Sie den Faden mit Nähfuß, dass sich dieser ca. 1 cm Naht zu verstärken. Taste zum Hilfe des eingebauten innerhalb des Stoffes befindet Rückwärtsnähen drücken und... -
Seite 16: Zick-Zack Nähen
Federstich (offener Overlockstich) Maschineneinstellung Maschineneinstellung Stichwahlknopf Stichwahlknopf Stich (17) Stich (9) Fadenspannung Fadenspannung von 1 - 4 von 1 - 4 Stichlänge SS Stichlänge 1 - 2 Legen Sie zwei Stoffe mit den Maschine wie auf Abbildung rechten Seiten aufeinander. einstellen. -
Seite 17: Reißverschluss
Reißverschluss Einnähen Rollsaum Maschineneinstellung Maschineneinstellung Stichwahlknopf Stich (5) Stichwahlknopf Stich (5) Fadenspannung Fadenspannung Stichlänge 3 - 6 2 - 6 Stichlänge 1 - 4 2 - 4 1.5-4 Stellen Sie die Maschine wie auf der Abb. ein. Legen Sie genau von der Befestigen Sie die Nähfußsohle so an dem Stoffkante eine Füßchenhalter, dass sie rechts von der Nadel... -
Seite 18: Knopf Annähen
Knopf annähen Maschineneinstellung Stichwahlknopf Stich (9) Zick-Zack-Fuß Fadenspannung Stichlänge muss nicht von 1 - 4 Stopfplatte eingestellt werden Verwenden Sie zum Knopf annähen die Stopfplatte. Maschine wie auf Abb. einstellen. Nadel nach oben, Zickzackzeiger auf O stellen und 3-4 Stiche nähen. Knopf und Stoff befinden sich unter dem Füßchen. -
Seite 19: Knopfloch
Knopfloch nähen Maschineneinstellung Stichwahlknopf Stich (1) Stichlänge Fadenspannung von 1 auf 5 Knopflochfuß Stellen Sie den Muster- Nähen Sie nun die linke Seite. Stellen Sie den Muster- wahlknopf auf . Senken Sie Dies hilft, Fehler zu vermeiden. wahlknopf auf und nähen 5 den Nähfuß. -
Seite 20: Muschelsaum
Muschelsaum Der Muschelsaum ist eine Ziernaht, der an Maschineneinstellung Kanten Bogen bildet. Legen Sie die Stichwahlknopf Stich (17) Stoffkante unter den Nähfuß und nähen Sie nun an der Kante entlang. Fadenspannung von 3 - 9 Stichlänge 1-2 Zick-Zack-Fuß Stichprogramm Sticheinstellung Maschineneinstellung Fadenspannung Elastikstichen... -
Seite 21: Reinigen Der Maschine
Bei allen Wartungsarbeiten wie z. B. Nadel wechseln, Reinigen und Ölen muss die Stromzufuhr unterbrochen werden! Bei allen Wartungsarbeiten wie z. B. Nadel wechseln, Reinigen und Ölen muss die Stromzufuhr unterbrochen werden! Bei allen Wartungsarbeiten wie z. B. Nadel wechseln, Reinigen und Ölen muss die Stromzufuhr unterbrochen werden! Entfernen der Spulenkapsel Reinigen der Maschine Geben Sie einen... -
Seite 22: Fehlertabelle
5. Über Knöpfe, Zipp ect. genäht Langsam Nähen wenn Knöpfe ect. in der Nähe sind Fehlstiche 1. Nadel falsch eingesetzt oder verbogen 2. Greifer beschädigt Blaupunkt Servicehotline anrufen 3. Falsche Nadel verwendet 4. Nicht richtig eingefädelt Naht zieht sich beim Nähen zusammen 1. Falsche Fadenspannung 2. - Seite 23 DO NOT THROW AWAY! NE PAS JETER! BITTE NICHT WEGWERFEN! ¡NO DESECHAR! NON SPRECHIAMO NULLA! GOOI DIT NIET WEG WIEDERVERWERTUNG Wir sind zum Umweltschutz verpflichtet. Unser Bestreben ist, den Umwelteinfluss unserer Produkte zu minimieren, indem wir ständig unsere Herstellungsmethoden verbessern. Bitte beachten Sie bei der Entsorgung des Produktes, dass dies nach den folgenden umweltfreundlichen Richtlinien geschieht.
- Seite 25 English UK ONLY IMPORTANT PLEASE READ CAREFULLY The wires in this mains lead are colored in accordance with the following code: BLUE-NEUTRAL BROWN-LIVE (OR ACRTIVE) As the colors of the mains lead of this appliance may not correspond with the colored markings identifying the terminals in your plug -- PROCEED AS FOLLOWS: The earth plug pin is unnecessary.
- Seite 26 English WARNING Keep fingers away from all moving parts. Special care is required around the sewing machine needle. Always use proper needle plate. The wrong plate can cause the needle to break. Do not use bent needles. Do not pull or push fabric while stitching. It may deflect the needle causing it to break. Switch the sewing machine off ("O") when making any adjustments in the needle area, such as threading needle, changing needle, threading bobbin, or changing presser foot, etc.
- Seite 27 TABLE OF CONTENTS SECTION I ESSENTIAL PARTS Adjusting Stretch Stitch Balance…… Sewing Buttons………………………………. Name of parts……………………………………... Reverse Stitch Control………………. Buttonhole Stitching…………………………. Darning Plate…………………………. Left Needle Position…………………. SECTION V DECORATIVE STITCHING SECTION II GETTING READY TO SEW Shell Tuck…………………………………….. Connecting the Machine to the Power Supply… Stretch Stitch Patterns……………………….
-
Seite 28: Parts Diagram
PARTS DIAGRAM Names of Parts Spool Pin Bobbin winder Bobbin winder thread guide stopper Bobbin winder Thread guide Spindle Stitch length control knob Take up lever Fadengeber Reverse stitch Lever Face Plate Needle Plate Arm cover Balance wheel Presser foot lever Screw Ausloserad Stitch selector... -
Seite 29: Connecting The Machine To The Power Supply
GETTING READY TO SEW Connecting the Machine to the Power Supply Foot Control Sewing Light (For E14 bilb only) The sewing light is located behind the Sewing speed can be varied by face plate. the foot control. Before connecting the machine to the power supply, make sure The harder you press on the Turn the screw counter-clockwise and that the voltage and frequency of your electricity matches that of... -
Seite 30: Extension Table (Accessory Storage Box)
Extension Table (Accessory Storage Box) Extension Table The extension table provides added sewing surface and can be easily removed for free arm sewing. For free arm sewing Pull the end of the extension table away from the machine, as illustrated. For attaching the table Push the extension table toward the machine making sure that the locating pins are aligned. -
Seite 31: Changing Needles
Changing Needles Switch off the machine and disconnect the machine from the power point. Loosen the needle clamp screw by turning it counter-clockwise. Undo the needle clamp screw just enough to release the needle. Remove the needle from the clamp. Insert the new needle into the needle clamp with the flat side away from you. -
Seite 32: Setting Spool Pin
Setting spool pin Removing or Inserting the Bobbin Case Removing or Inserting the Bobbin Case Switch off the machine while doing this! Switch off the machine while doing this! Einstellen Garnrollenstift Inserting the Bobbin Case Inserting the Bobbin Case Ziehen Sie den Garnrollenstift. Pull out the spool pin. -
Seite 33: Threading Bobbin Case
Threading Bobbin Case Place bobbin into bobbin Place bobbin into bobbin Pull the thread into the bobbin Draw the thread under the tension Draw the thread under the tension case. Make sure the thread case. Make sure the thread case slot. spring and into the delivery eye. -
Seite 34: Drawing Up Bobbin Thread
Drawing up Bobbin Thread Pull 15cm (6") of both threads back and Raise the presser foot and hold the needle Turn the balance wheel slowly towards you under the presser foot. thread lightly with your left hand. with your right hand until th e needle goes down and continue turning balance wheel until the take-up lever is at its highest position. -
Seite 35: Stitch Selector Dial
Stitch Selector Dial The stitch selector not only determines the stitch you select, but also Setting mark regulates the stitch width for regular zigzag and rick rack stretch stitches. 15 17 19 21 NOTE: To avoid needle or fabric damage, be sure your needle is up and out of the fabric when adjusting this control. -
Seite 36: Adjusting Stretch Stitch Balance
Adjusting Stretch Stitch Balance Adjusting Stretch Stitch Balance To select Stretch Stitches, set this control at SS position. Setting mark Stitch length In stretch stitch sewing, Stitch Length Control should be in + .SS. - the Center position between - and + (SS position) for most materials. -
Seite 37: Straight Stitch Sewing
BASIC SEWING Straight Stitch Sewing Make sure the take-up lever is at the highest position before starting Machine Setting Stitch selector Stitch (5) Upper thread Stitch length tension dial 2 to 6 1.5 ~ 4 1.5 - 4 Raise the presser foot and position For fastening the ends of seams, The threads are cut to the proper press the reverse stitch control and... -
Seite 38: Overcasting
UTILITY STITCHING Overedge Stitch Overcasting Machine Setting Machine Setting Stitch (18) Stitch selector Stitch selector Stitch (9) Upper thread Upper thread tension dial 1 to 4 tension dial 1 to 4 Stitch length SS Stitch length 1 to 4 Overedge stitches are most This type of stitch is used on the effective when the right side seam to prevent fabrics from... -
Seite 39: Zipper Application
Zipper Application Rolled Hem Machine Setting Machine Setting Stitch selector Stitch selector Stitch (5) Stitch (5) Upper thread Upper thread Stitch length tension dial 3 to 6 tension dial 2 to 6 Stitch length 1.5 to 4 1.5-4 Pin or baste zipper tape to fabric and place it Make a double 0.25cm under the foot. -
Seite 40: Sewing Buttons
Sewing Buttons Machine Setting Machine Setting Sti tch (9) Stitch selector Zigzag foot Upper thread Upper thread Stitch length control any number (not tension dial tension dial 1 to 4 necessary to adjust) Darning plate Use the darning plate for button sewing (see page 10). Use the darning plate for button sewing (see page 10). -
Seite 41: Buttonhole Stitching
Buttonhole Stitching Machine Setting Stitch selector Stitch (1) Stitch length Upper thread tension dial 1 to 5 Buttonhole foot Set the stitch selector at " ". Sew down the left side stopping Set the stitch selector at " ", sew 5 stitches of bartack and at the bottom mark. -
Seite 42: Shell Tuck
DECORATIVE STITCHING Shell Tuck Place the folded edge along the slot of the Machine Setting foot. The needle should fall off the edge of the Stitch (17) Stitch selector fabric on the right forming a tuck. Upper thread tension dial 3 to 9 Stitch length 1-2 Zigzag foot Stretch Stitch Patterns... -
Seite 43: Dismantling And Assembling Hook Race
When caring for your machine, cleaning, removing the thread or any other function please make sure that the power is switched When caring for your machine, cleaning, removing the thread or any other function please make sure that the power is switched When caring for your machine, cleaning, removing the thread or any other function please make sure that the power is switched off and the machine is unplugged! Dismantling and Assembling hook race... -
Seite 44: Trouble Shooting
Trouble Shooting... - Seite 45 Environment Meaning of crossed out wheeled dustbin: Do not dispose of electrical appliances as unsorted municipal waste, use separate collection facilities. Contact your local government for information regarding the collection systems available. If electrical appliances are disposed of in landfills or dumps, hazardous substances can leak into the groundwater and get into the food chain, damaging your health and well-being.
- Seite 47 Français Important : PRESCRIPTION DE SECURITE Lors de l’utilisation d’un appareil électrique, des mesures élémentaires de sécurité doivent toujours être respectées. Lire toutes les prescriptions avant utilisation (de cet appareil) DANGER – Afin de réduire le risque d’électrocution : Il ne faut jamais laisser un appareil sans surveillance lorsqu’il est branché. Toujours déconnecter cet appareil de la pris électrique immédiatement après l’avoir utilisé...
- Seite 48 Français ATTENTION Eloigner les doigts de toutes les parties en mouvement. Il faut faire particulièrement attention au niveau de l’aguille de la machine à coudre. Toujours utiliser la plaque aiguille appropriée. Si vous n’utilisez pas la plaque appropriée, l’aguille peut casser. Ne pas utiliser d’aguilles tordues.
- Seite 49 TABLE DES MATIERES PARTIE I PARTIES ESSENTIELLES Réglage du points stretch Couture de la boutonnière…………………. Nom des pièces…………………………...…………. Marche arrière………………………. PARTIE VOINTS DE DECORATIES……... Coudre avec le guide fil……………. PARTIE II AVANT DE COMMENCER Plaque de Reprisage………………. PARTIE IV ENTRETIEN DE LA MACHINE A COUDRE Position de l’aiguille à...
-
Seite 50: Nom Des Pieces
NOM DES PIECES Nomenclature Porte bobine Guide fil pour le bobinage de Stoppeur bobinage la canette canette Guide fil Bobineur canette Réglage longueur de point Tendeur de fil Fadengeber Bouton de marche arrière Capot Plaque Couverture de bras aiguille Releveur de pied Volant presseur Volant de... - Seite 51 AVANT DE COMMENCER A COUDRE Branchement de la pédale et du cordon d’alimentation électrique Le rhéostat Remplacement de l’ampoule L’ampoule est situé dans le coté latéral de La vitesse de couture peut la machine. Dévissez et enlevez la varier selon la pression exercée coquille.
- Seite 52 Table d’extension (Boîte accessoires) Table d’extension Permet d’optimiser votre surface de couture et permet d’utiliser la machine en bras libre Pour la couture en bras libre Enlever la tablette de la machine comme illustré. Pour la remettre en place la pousser dans son logement.
-
Seite 53: Changement D'aiguille
Changement d’aiguille Desserrez la vis suffisamment afin de libérer l’aiguille. Eteindre la machine et la débrancher. Retirer l’aiguille. Insérez un nouvelle aiguille dans son logement avec le coté plat vers l’arrière. Insérer l’aiguille dans son logement aussi loin qu’elle puisse aller et serrer fermement la vis de maintien à... -
Seite 54: Enfiler Le Fil Supérieur
Enfiler le fil supérieur Installation de la tige porte bobine Fil supérieur Fil supérieur Trous Bourrage Einstellen Garnrollenstift Mise en place du boitier canette Mise en place du boitier canette corne Ziehen Sie den Garnrollenstift. Mise en place du boitier canette corne Mise en place du boitier canette corne Ouvrir le cache co Ouvrir le cache co ursière... - Seite 55 Mise en place la canette Placer la canette dans le Tirer le fil dans l’encoche du Passez le fil sous le ressort de ressort de boitier. Assurer vous que le fil boitier. Assurer vous que le fil boitier. tension et dans l’encoche, laissez tension et dans l’encoche, laissez se déplacera dans la direction se déplacera dans la direction...
-
Seite 56: Réglage De La Tension Du Fil
Enfiler le fil de la canette Tirez un longueur de 15cm de chaque fil Levez le pied presseur, maintenir le fil avec Tournez le volant vers vous jusqu’à ce que vers l’arrière et abaissez le pied presseur. la main. l’aiguille descende puis remonte à sa position la plus haute. -
Seite 57: Sélecteur De Point
Sélecteur de point Le sélecteur de point n’indique pas seulement le point que vous marque avez sélectionné mais règle également la longueur du point des points zig-zag et stretch. 15 17 19 21 Note : pour éviter de casser l’aiguille, assurez-vous toujours que celle-ci est en position haute lors de ce réglage 16 18 20 22... -
Seite 58: Réglage Du Points Stretch
Réglage du point stretch Pour sélectionner le point stretch, amener le bouton sur la maque longueur de point position SS. + .SS. - Pour la couture du point stretch, le réglage de la longueur du point doit être sur la position médiane, entre le - et le + (position SS) pour la plupart de tissus. -
Seite 59: Partie Iii Bases De Couture Coudre Un Point Droit
BASES DE COUTURE Assurez-vous toujours que le releveur de Couture point droit fil est position haute avant de commencer Réglage de la machine Point (5) sélecteur de point contrôle de la tension supérieure sélecteur de de fil 2 à 6 longueur de point 1.5 ~ 4 baissez le pied de la biche sur le... -
Seite 60: Surfilages
Points utilitaires Surfilage Point de recourvrement Réglage de la machine Réglage de la machine point (17) sélecteur de point point (9) sélecteur de point contrôle de la contrôle de la tension tension supérieure supérieure de fil 1 à 4 sélecteur de longueur de fil 1 à... -
Seite 61: Pose De Fermeture Éclair
Fermeture à glissière Coudre un ourlet Réglage de la machine Réglage de la machine point (5) sélecteur de point sélecteur de point point (5) contrôle de la contrôle de la tension supérieure tension supérieure sélecteur de longueur de fil 2 à 6 de fil 3 à... -
Seite 62: Couture Des Boutons
Couture des boutons Réglage Réglage de la machine point point (9) sélecteur de point pied-de-biche zig-zag contrôle de la contrôle de la tension supérieure tension supérieure contrôle longueur de de fil de fil 1 à 4 point Utiliser la plaque de reprisage pour la couture des boutons Utiliser la plaque de reprisage pour la couture des boutons Pour renforcer la couture, laisser Pour renforcer la couture, laisser... - Seite 63 Point boutonnière Réglage de la machine point (1) sélecteur de point sélecteur de longueur de point contrôle de la tension supérieure de fil 1 à 5 pied-de-biche boutonnière Placer le sélecteur sur la Coudre du coté gauche et Placer le sélecteur sur la position , les deux fils placés arrêtez vous à...
- Seite 64 POINTS DECORATIFS Placer le tissu et procéder comme indiqué Réglage de la machine (l’aiguille doit piquer au bord du tissu). point (17) sélecteur de point Réglage de la machine. contrôle de la tension supérieure de fil 3 à 6 sélecteur longueur de point 1 à...
- Seite 65 Lots de l’entretien ou du nettoyage de votre machine, retirez le fil, débranchez le rhéostat (même lors d’un changement d’aig Lots de l’entretien ou du nettoyage de votre machine, retirez le fil, débranchez le rhéostat (même lors d’un changement d’aig Lots de l’entretien ou du nettoyage de votre machine, retirez le fil, débranchez le rhéostat (même lors d’un changement d’aig uille)! Démontage et remontage de la coursière Extraction de votre machine...
- Seite 67 NE PAS JETER ! Recyclage Nous sommes concernés par la protection de l’environnement. Nous nous efforçons de réduire l’impact négatif de nos produits sur l’environnement en améliorant continuellement nos produits, nos méthodes de production. Lorsque le moment est venu de vous débarrasser de votre ancien appareil, nous vous demandons de le faire dans les conditions les plus respectueuses possibles de l’environnement.